Showing posts with label Presser Foot Series. Show all posts

Thursday, July 17, 2014

Presser Foot Series: Walking Foot


Hello all! It's time for another installment of our Presser Foot Series! Today we're talking about the Walking Foot. The walking foot looks a bit more complicated than most presser feet, but it couldn't be simpler to use.


This is not a snap on foot. If your machine has a snap on adapter, you will need to unscrew it to install the walking foot.


There is an arm that raises, and you will want to fit the bracket at the end of it onto the bar you see protruding to the right of your needle.


And of course you will need to attach the side bracket around the main post and secure it with the screw that was securing your snap on adapter.


The way a walking foot works is pretty simple. Basically the arm at the top operates the levers inside the casing and they move these little white plastic grips that fit inside the grooves in the front of the foot. 


This gives you a set of feed dogs on top that move at the same speed as the ones on the bottom, and together they all work together to move your two (or more) layers of fabric under the needle at the same speed without shifting.

This foot is AMAZING for sewing multiple layers, like you would do for quilting straight lines or making faux chenille. It's also amazing for sewing with slippery fabrics like minky.

For Christmas I made my month old nephew Lawrence a cuddle blanket from flannel and dot minky. I wish I could show you a better picture of it, but all those photos are on a hard drive that's out of reach for the moment, so you'll have to settle for this cell phone pic of Nick holding him wrapped in it just after the New Year.


Now he's almost 8 months old, and it's become the blankie, much to my delight. It was such a simple project that it doesn't really call for a tutorial, but I'll give you a basic point by point:

  • Wash and dry both fabrics to prevent uneven shrinking after sewing.
  • Cut both fabrics to the same size. Honestly I didn't measure, I just squared the edges of one fabric and cut the other to match, but I believe it was approximately 45" (width of the bolt) by 54" (yard and 1/2).
  • Place fabrics right side together and pin.
  • *Optional* Round your corners by using a plate as a template and cutting around it with scissors or a rotary cutter.
  • Sew almost all the way around, leaving approximately 3-4 inches open on one side for turning.
  • Clip your corners and turn your blanket right side out.
  • Make sure your corners (if you have them) are well turned.
  • Tuck in the seam allowance on the opening you left and pin closed.
  • Topstich around the entire blanket, closing your opening.
  • Done!
At the beginning of May we had another sweet little addition to the family, this one born to Nick's sister Rachael, who just so happens to be married to my brother Cary. :) Precious Adelaide joined us after a longish line of grandsons, and I was tickled uh, pink to get a girl to sew for! Not that boys aren't fun too, but hello ruffles and bows!

Anyway, I finally got a chance to make a blanket for her too. These are the fabrics I went with.


I made this blanket at night after the kids were in bed, and I had to deliver it the next day, so I didn't have a chance to take it outside and hang it up for pictures, but I was able to snap a few inside.


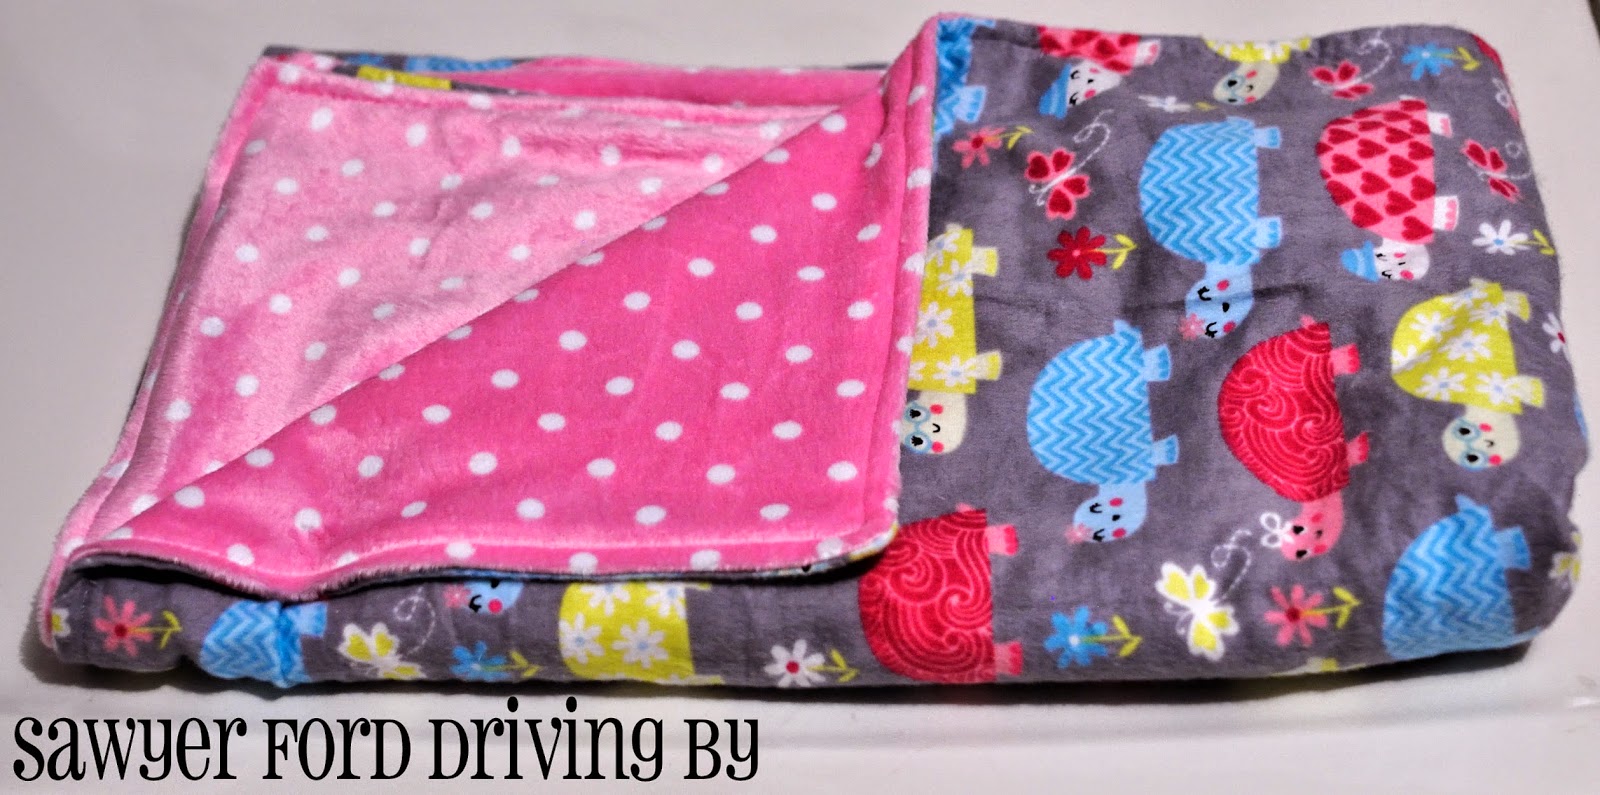

It's not perfect, but it's very soft and cuddly, and the minky was SO much easier to sew using the walking foot!

Cuddle fabrics are generally on the pricey side, so I snap them up when I find them in the remnant bins, which is where I scored the sweet pink and white polka dot I used here. It was a serious win to find a remnant this large, and I had so much fun picking out a coordinating flannel, because I knew right away what I wanted to do with it.

A few weeks ago I found a yard and 1/2 of this fluffy orange Ultra Cuddle, and I paired it with this fun robot flannel. I made a blanket for Sawyer from them, and now he has to have his "Wo-bot" before he goes to bed. :) Again, sorry for the night time kitchen photography.


I also made one for Taylor back at Christmas from orange and white chevron flannel backed with aqua cuddle fleece, but right now she's wrapped up in it asleep. :) I guess I'd better go back through my remnant bag to find something to make one for Lily too!

Thursday, May 29, 2014

Presser Foot Series: Invisible Zipper Foot


Today I'm going to tell you about the invisible zipper foot.


You wouldn't believe how easy this foot makes installing invisible zippers! On the bottom of the foot are these two groves that fit right over the teeth of the zipper, making sure your needle goes exactly where it needs to go.


First, read the instructions that came with your invisible zipper regarding how to place it against the edge of your fabric. If you're repurposing a zipper, as I did here, and don't have the instructions, the best way to do it is to lay your zipper down right side up, then place the sides of your fabric where it will be sewn, seam allowance already folded, on top of the zipper where it will meet the zipper. Pin one side in place, then open your zipper all the way up.

Now, if you are working on the right side of the zipper, place the teeth of the zipper under the right groove. If you're working on the left side of the zipper, you'll utilize the left groove. Make sure your needle is in the center position no matter which side of the foot you're using. The groove will position the zipper so that your seam goes right along the teeth.

Sew all the way down until you're stopped by the zipper pull, then stop and sew the other side of the zipper. Now, zip up the zipper. Okay, this is the part I forgot to get picture of, but it's really simple. You're just going to close up the rest of the seam on the skirt. Sew it with a seam allowance matching that of the zipper, and sew from the bottom of the skirt up, sewing the bottom of the zipper when you come to it.

See how it's sewn right into the seam!


Here's the finished skirt! It ended up being just a little loose on her, but that will give her a little more time to wear it.


See how invisible the zipper is!


Wednesday, May 28, 2014

Presser Foot Series: Overcasting Foot


Today we're talking about the overcasting foot.


I found this sweet embossed polyester-cotton blend in the remnant bin at Joann's and knew it was destined to be a skirt for Lily.


There was just about a half a yard there. I decided to make a modified version of Simple Simon and Co's Vintagely Modern Skirt. My main differences were making it less full (due to the fact that the fabric was only twice the width of her waistline instead of the three times width their pattern calls for), adding trim at the hemline, an invisible zipper in the back, and pockets.

I'm not going into detail on how I made the skirt, because you should really check out the link above. They explain it so much better than I ever could! To add the pockets I followed this tutorial over at Make It & Love It. But I did want to show you this handy little tool I used to add a seam allowance to the pocket pattern I drew. It's called a Quilter's Wonder Wheel, and I picked it up at Tuesday Morning ages ago for 99¢. Do you have a Tuesday Morning in your town? If you do, you should totally check out their sewing/crafting aisles. TONS of great deals! I recently found sewing machine needles there priced 3 five packs for 99¢. That's 15 needles for less than $1! Well, tax, but whatever.


Anyway, to use the wheel you just stick a pencil in the center and roll it around the edge of your pattern to add a perfect 1/4 inch seam allowance! Mechanical pencils work best because the hole it so small.


The overcasting foot came in handy here for finishing the seams of the skirt without using a serger. This particular stitch on my machine is one that I love because it seams and finishes at the same time, but you can use it with just about any finishing stitch, including a plain old zigzag.


The overcasting foot is designed with a guide for the edge of your fabric to make it easy to keep the seams even and to make sure that the overcasting stitches fall off the edge of the fabric as they're supposed to.


These stitches can generally be done with a standard zigzag foot, but I find that I get more consistent, neat finishing if I take just a second to switch to the overcasting foot.

Tomorrow we will talk about how to use the invisible zipper foot to install the zipper, and I'll show you the finished skirt, but here's a little peek at the pockets.


Sunday, May 25, 2014

Presser Foot Series: Rolled Hem Foot

Today we're talking about the rolled hem foot.


A rolled hem foot is specially designed to help you achieve tiny neat hemlines on lightweight fabrics. As you can see, there is a little spiral guide on the foot.


This is to tuck your fabric edge into a neat fold just before it goes under the needle.


You will see this hem on things like napkins, bandanas, and formal dresses in satins or chiffons. This size of hem is very hard to achieve neatly with simple pressing because it is so small. And many of the fabrics it is appropriate on are not able to be ironed or pressed.

My girl Taylor came home with a few new maxi dresses from Nanny and Papaw a few days ago. They were all so cute on her, but all but one were way too long. Enter the rolled hem foot!

This dress was made from super stretchy knit, so I was a little nervous about how the rolled hem foot would handle it. Fabric like this can have a tendency to get sucked down into your machine with a standard zigzag foot. There was no need to worry though - it handled it wonderfully! Now if this were not a maxi dress you would probably want to go with something more stretch friendly like a three step zigzag or a double needle stitch. But because the hemline has such freedom of movement this was perfect.


I cut the dress off just 1/4 inch longer than I wanted the final length to be. Then I hemmed the raw edge of the piece I cut off to make sure the fabric would work with the foot. It turned out great, so I started on the dress.


It can be a little fiddly to get your seam started, especially on a closed hem like a dress, so I recommend starting near a side seam if possible. Slide the edge of your fabric up and into the spiral guide. It will help keep it feeding in neatly if you hold the edge folded a bit over the left side of the foot.

Your needle needs to be in the center position, and you want to start with a slow speed and remain there until you are comfortable going a bit faster. It's important to keep your seam folded up as it goes into the foot. Keep your hand on the fabric to keep it from shifting and pulling out of the guide.


Look how pretty that hem is!


Two important tips to remember: make sure that the edge you are hemming is a smooth one. Look it over before hemming and make sure you don't have any jagged spots. The edge you are hemming also needs to be a clean edge. Trim any frayed threads before hemming or they will end up getting rolled into your hem and sticking out from it.

I sewed a few other fabrics to show you how it behaves with them. I'm working on a skirt for Lily using these fun mustache bandanas. But the bottom of the bandanas had this lettering that I wanted to get rid of, so I cut it off and hemmed it. This fabric did particularly well with the rolled hem foot.


This is a strip of satin that shows what happens if you have an uneven or frayed edge.


This is a chiffon that did well, although the shimmery plastic dots fused to the fabric made parts of the hem a little wavy where the dots were part of the seam.


This foot did not come with my machine, but it is available at a very reasonable price. Mine came in this kit (not an affiliate link), which is less than $10 including shipping and includes 11 pieces. 

Tomorrow Tuesday we will be talking about the overcasting foot.

Saturday, May 24, 2014

Presser Foot Series: Button Foot


Today we're going to learn how to use our machine to sew on a button. Admittedly, it's not very hard to sew a button on by hand. But it is kind of a pain in the butt. At least to me it is. So if I can use my machine to do it, I'm happy to do so.

So this is really easy. First grab your button foot, which looks like this:


Pop it on your machine and grab the button you're going to use. Now measure between the holes of your button. What you're looking for is the distance in millimeters. 


Now set your stitch on your machine. It should look something like this:


Now follow your manual's instruction to change your stitch width. For this project I set my width to 4.5 mm, the largest my machine will accommodate. Now place your button under your presser foot, with the holes between the prongs of the foot. Now manually move your flywheel to lower the needle slowly to check and make sure it is landing in one of the holes in the button. When you have the button position correct, start sewing. Your machine should stop automatically when the button is sewn on.


When you are finished, pull the loose thread(s) through the holes in the button to the back and tie in a knot to keep it from unraveling. 


And now we're all done! I found that my case, like Cheri's, will hold a slim wipes case and 3-4 size 3 diapers. 


Tomorrow we will explore the rolled hem foot.