Showing posts with label Lily. Show all posts

Saturday, October 8, 2016

A Birthday Banner for the Birthday Girl

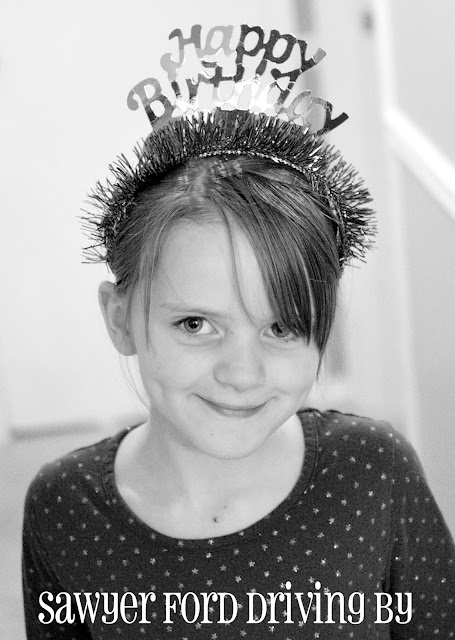
So this girl turned SEVEN on Wednesday! I can't even handle this. She just got out of diapers, I swear.


We had a simple family get together at the house on Tuesday, and I made this Happy Birthday Banner to hang in the dining room. I used 4 sheets of kraft cardstock and 2 sheets of scrapbook paper. I cut the cardstock in fourths (I had 3 extra fourths), and cut the scrapbook paper into 3"x 5" pieces to use in my Alphabet Punch Board. I ran the letters through my Xyron Creative Station to adhere them to the cardstock and strung it all on baker's twine. I think I'm going to take the BIRTH off now that we're done so that it just says Happy Day and hang it in her room.


Man, I love banners! This is one I made a couple of weeks ago for a baby shower at church. I cut the flags using my paper cutter, the letters using my Alphabet Punch Board, and the deer using a paper punch. I ran all the letters and the deer through my Xyron Creative Station to turn them into stickers which made the assembly super quick. Colton's mom is doing his nursery in an outdoorsy theme, so hopefully she can use it in there too. 

Thursday, October 6, 2016

Early Fall

Okay, a reasonable person might be expected to believe that I had dropped off the face of the earth. In reality, the settling in to the school year along with various other unexpected occurrences has hit us like a freight train and blogging has gotten pushed to the back burner. But I'm here now! So I hope you're ready for some pictures, because I've got a few to share.


This is a little half octagon table Nick and I refinished. Okay, it was way more him than me, but I helped a little. I am so terribly sad that I didn't get a picture before he started tearing it apart, but trust me, it was UH-GLEE. Think sea foam crackle paint all over, and the veneer on two of the doors was badly damaged. That's where he really impressed me - he smoothed it all out with Wood Bondo, and you can't even tell it's not original. The top was in good condition, so we just stripped, sanded, and stained it. We used a Rustoleum stain in Kona.


I shared this image over on Instagram. These lovely little banners were inspired by the one made by the adorable Bethany at Pitter & Glink. I made a cardstock template for my banners using my We R Memory Keepers Banner Punch Board, then cut two for each banner from dropcloth. I machine stitched them together with pink thread, then cut the words from htv using my Cameo. The font I used was Magnolia Sky, which is free for personal use. The flowers and bow are a variety of purchased and handmade pieces. I punched holes in the corners and added eyelets using my Crop-a-Dile Punch and Eyelet Setter, threaded in some random satin ribbon I had on hand, and knotted the ends on the front. On the back of each banner I hot glued a wooden skewer cut to size along the top to keep the banner hanging straight. The Create Beauty banner is hanging in my craft room (as pictured below), and the Be Kind is part of Lily's gallery wall.


So this happened in late August. Sawyer wasn't feeling well at all and we couldn't get a doctor's appointment, so I took him to the ER. By the time we got there he was having some breathing distress and they ended up keeping us for two days. We never did find out exactly what the problem was, but the best guess was that he had a virus combined with an allergic reaction to something that really hit him hard. Below is a picture of him hanging out with his buddy Chase, who brought him Play-Doh, cars, and snacks and spent some time looking suitably impressed with Sawyer's grand tour of his hospital room.


Nick works for Lexus and they sent him this amazing gift basket, which was such an awesome thing for them to do!


Nick's cousin got married last month, and we stayed at an amazing chalet near the wedding venue where they had this gorgeous handmade quilt on the bed. I'm in love!


We got to see Nick's sister Kristin and her family, which was awesome. They live in Texas, and it had been over a year since we'd seen most of them. It was so much fun to get the kids together with their cousins!


Our Lily girl got baptized a couple of weeks ago, and she couldn't have been more precious.


So those are a few of the things that have been keeping us busy lately. What have you been working on?

*There are no affiliate links in this post. I have not been compensated for using any product mentioned in this post. I just like to share what I have used in case you might want to use it too!

Friday, October 23, 2015

Lily's Birthday Skates


My Lily girl turned 6 on October 5. S-I-X! I never gave permission for this growing up business. Hmph!


Anyway, last year I made most of her gifts, and we did the whole awesome Adopt-A-Baby Party. We decided not to do big friend birthday parties for the kids this year because of the house being on the market, and with most of my craft supplies in storage, I didn't do much with handmade gifts.

We did have a small family gathering at the house though, and I did do a bit of upcycling on one gift, which turned out to be her favorite. A month or so ago she was invited to her first school friend birthday party. Have I mentioned that this girl started kindergarten in August? I didn't? Oh that's right, it's because I'm still in denial. But pushing onward, this birthday party was held at the skating rink. Let me just inject a hard earned word of wisdom for you here: don't wear flip-flops to a 6 year old's skating party, and no I don't care to discuss it further. Lesson learned. Anyway, she started out very scared of the whole concept of skating, but by the end of the party I had to dodge speeding skaters to make my way out to the center of the rink to rescue her where she had ventured out and ended up on the floor with no nearby rails on which to pull herself up. She was sold on the wheeled lifestyle.

A few days before her birthday I was at the thrift store and came across these well loved Barbie skates in her size for $3.99.


As you can see, they had some major scuffing on the toes.


So I headed to Walmart where I grabbed a 75 cent clearance fat quarter and a $1 roll of pompom trim from their Halloween ribbon selection. I used a piece of scrap fabric to lay over the toe of one skate to trace around and get a rough idea of the shape I would need to cover the damage, then used that as a template to cut the pieces out of my fat quarter. Then I used Aleene's Original Tacky Glue to adhere the fabric to the toe, and carefully trimmed away any excess with my Xacto knife. I cut two pieces of trim for each skate, one to go across the top edge of the fabric and one to go around the base of the toe, then hot glued them down using my glue gun on the high setting. Then I snipped off the bows and made new ones using the fat quarter, although I did reuse the center bands since they were in good shape. I just hot glued these back on using the high setting again.


If I do this again, I will seal the fabric with Mod Podge to make them easier to wipe down, but this was completed just a little while before she got home from school, so there wasn't really time to let it dry.


As you can see, she was pretty excited about them. In fact, she stopped everything to go find a pair of socks and put them on immediately. Her Nana and Papaw bought her knee and elbow pads and a helmet a few days later, and she's been skating her heart out in the garage ever since. She's gotten really steady on them, and I'm excited to get to take her back to the skating rink.


Thursday, October 16, 2014

Lily's 5th Birthday Party

On the 11th we had a birthday party for Lily at the Life Center at our church. We've always had small family celebrations for her, but this was her very first friend party, and it went so well!

We went with an Adopt-A-Baby theme, and it was easy breezy to put together. Now here's the part where I realize that I am ridiculous and forgot to get a picture of the the baby table before all the adoptive mothers descended on it. These two are the sum total of the pictures I got before the babies were all passed out.


But here's what they all got: a baby, two felt diapers, a blanket, a diaper bag, a gown, a felt bib, a baby bracelet, a pacifier, a baby headband, and a baby bottle.


The babies were collected over the last few months from various thrift stores and lovingly (and thoroughly) cleaned. What I loved about this (beyond the cost effectiveness) was that each baby was unique. Because there was a range of sizes, I made the diapers specifically for each baby. I just free-handed a couple of sizes based on baby diapers we already had, and made each baby one solid color diaper and one print diaper. They closed with Babyville plastic snaps.

I bought a pattern for the gowns (Simplicity 1937), and my mom sewed up the gowns using vintage fabric. The pattern was for a 15 inch doll, so for the smaller dolls I just flipped the gowns inside out and moved in the seam allowance. I added Babyville snaps to each gown to close it up the front.


The bibs were just cut from a couple of free-handed paper patterns and also closed with a Babyville snap.

I got the pretty ruffled elastic for the headbands from Tuesday Morning, and each headband had a different embellishment, some handmade, some purchased, all of them from my stash. I also made my sweet niece Adelaide one to match. :)

My mom made the blankets from fleece and flannel, and she found the diaper bags at the Dollar Tree. The bracelets were leftover cupcake embellishments from a baby shower, and the bottles and pacifiers came from the Dollar Tree as well.

There were a few boys there too, and they got to choose from an assortment of stuffed animals since baby dolls weren't really their bag. :) The boys who were big enough got to make Shrinky Dink name tags for their chosen animals while the girls played with dolls, and we tied them on with leather cord.


Since a lot of the accessories were crafted from materials already on hand, I think our total outlay for eight babies and accessories was about $30, or less than $4/each for what was a stunningly successful party favor. I saw a number of the adopted babies make an appearance at church the next day. :)

The animals cost even less, since I averaged about 50¢ each for those, and the Shrinky Dinks and leather were things I had in my stash.

There were no formal games at the party. What I did instead was cart in all our big baby doll items, including 3 beds, 2 bath tubs, a baby changing station, 2 cradles, a high chair, a bouncy seat, and numerous baby accessories. My mom also brought in two dollar store doctor kits and a box of princess Band-Aids, the latter of which lasted about 17 seconds lol.


Levi wasn't interested in babies, but he did think he might like a nap!

My mom graciously did the decorating and the food, and I couldn't have made the party happen without her! She made some delicious pudding filled lemon cupcakes, and supplemented them with store-bought Sofia the First cupcakes and a small sheet cake to hold the all important Number Five Birthday Candle. She also made up some fun butterfly snack bags that had a different type of cereal in each wing, and little daffodil accented containers filled with fruit snacks. For drinks there were various fruit drinks with twist off tops, and pineapple-orange cream punch - yum!


Lily was so blessed with all the gifts she received, and she was thrilled with them all! I loved watching her enthusiasm, whether she was opening a giant Frozen themed pen from the Target $1 Spot from her dad and I or an awesome Queen Elsa doll from my cousin Maggie, who always spoils me and mine rotten. :)


She had plenty of helping hands to assist in opening the gifts lol.


Aunt Rachael made her this gorgeous lace crown, and one other, along with a beautiful lace trimmed pink gown. I got pictures of her opening the other gifts, but things were moving so fast that I'm afraid they were a bit blurry.

This party was so much fun, and it thrilled my heart to get to see how engrossed all the kids were in playing! A huge thank you to everyone who came and played along!

Wednesday, August 13, 2014

Taylor, Lily, and Sawyer - Summer 2014

I got a chance a few days ago to take some quick pictures of the kids, and I wanted to share them here. I try to take semi formal shots of them each season, but sometimes it's a bit like the cobbler's children having no shoes. But the other day a free moment and happy kids happened at the same time, so I grabbed the opportunity that day and again the next, even if Lily's hair was a little in the awkward stage of growing out tousled and Sawyer was more interested in everything that wasn't the camera lens. I needed to capture Lily with her second missing tooth and Sawyer with his cheesy little grin and Taylor and her gorgeous eyes. I can't believe how much they've all grown, especially Taylor, who is so very pretty and now an eighth grader! Man I love these kids!