Showing posts with label Shrinky Dinks. Show all posts

Tuesday, November 25, 2014

The Fault in Our Stars Earrings


Have you read The Fault in Our Stars? Have you seen the movie? I read the book on my Kindle, then took Taylor to see the movie this past summer. And yes, we totally cried. Not quite like the lady behind us though. She was hardcore loud ugly-sobbing through pretty much the whole movie. I kind of felt like I should get her a Gatorade when it was over. Whoever you are, lady, I hope you eventually recovered. You know, fiction and all. But anyway.

One of the most beloved parts of both book and movie is the gentle banter between Gus and Hazel where they have a hard time hanging up the phone and keep stretching out the conversation with "Okay?" "Okay." "Okay?" "Okay."....and it becomes their thing. Their always.


I've seen all kinds of memes and pictures all over the internet honoring that little word, not to mention tons of accessories, many of them DIY. So I thought I would try my hand at a project of my own. I asked Taylor to give me a hand, and together we made up three styles of TFiOS themed earrings.


For this easy project I pulled out one of my favorite crafting materials: Shrinky Dinks. I used a sheet of the frosted and a sheet of the opaque white. Before you get started on cutting out your clouds, turn your oven on to 325° to preheat. Now, to cut out the clouds I used a Fiskars X-Large Cloud Squeeze Punch. You can totally cut these out by hand if you don't have a cloud punch. In fact, my first version of this was a set of best friends backpack tags I cut out by hand for Taylor and her bestie, and they disappeared immediately. But they were about 3 times the size of the earrings, and my cutting skills on anything small are highly suspect.


I'm going to show you the steps to make all three pairs of earrings at once. Of course if you just want to make one pair, just follow the directions for the pair you want. The first pair will require one cloud punched from each sheet, and the second and third pairs will each require two clouds cut from each sheet. So to make all three pairs, cut 5 clouds from the opaque white and 5 clouds from the frosted. A quick note: I made all my earrings with the white cloud on top and the black cloud on the bottom. Apparently this is backwards. But this is my blog, so nyah, nyah, nyah, nyah, nyah! If you want to make them the "right" way, just switch all the black and white clouds in the instructions. No biggie.


Imagine you see 5 frosted clouds here too. You'll see them in a minute.

Take your 5 frosted clouds (see?) and color them completely with black Sharpie. Color on the rough side. Taylor helped me with this.


Let these dry for a minute, and in the meantime take your 5 white clouds and use your black Sharpie to write {Okay?} on each one. Write it as neatly as you can, but you're going for a handwritten look here.
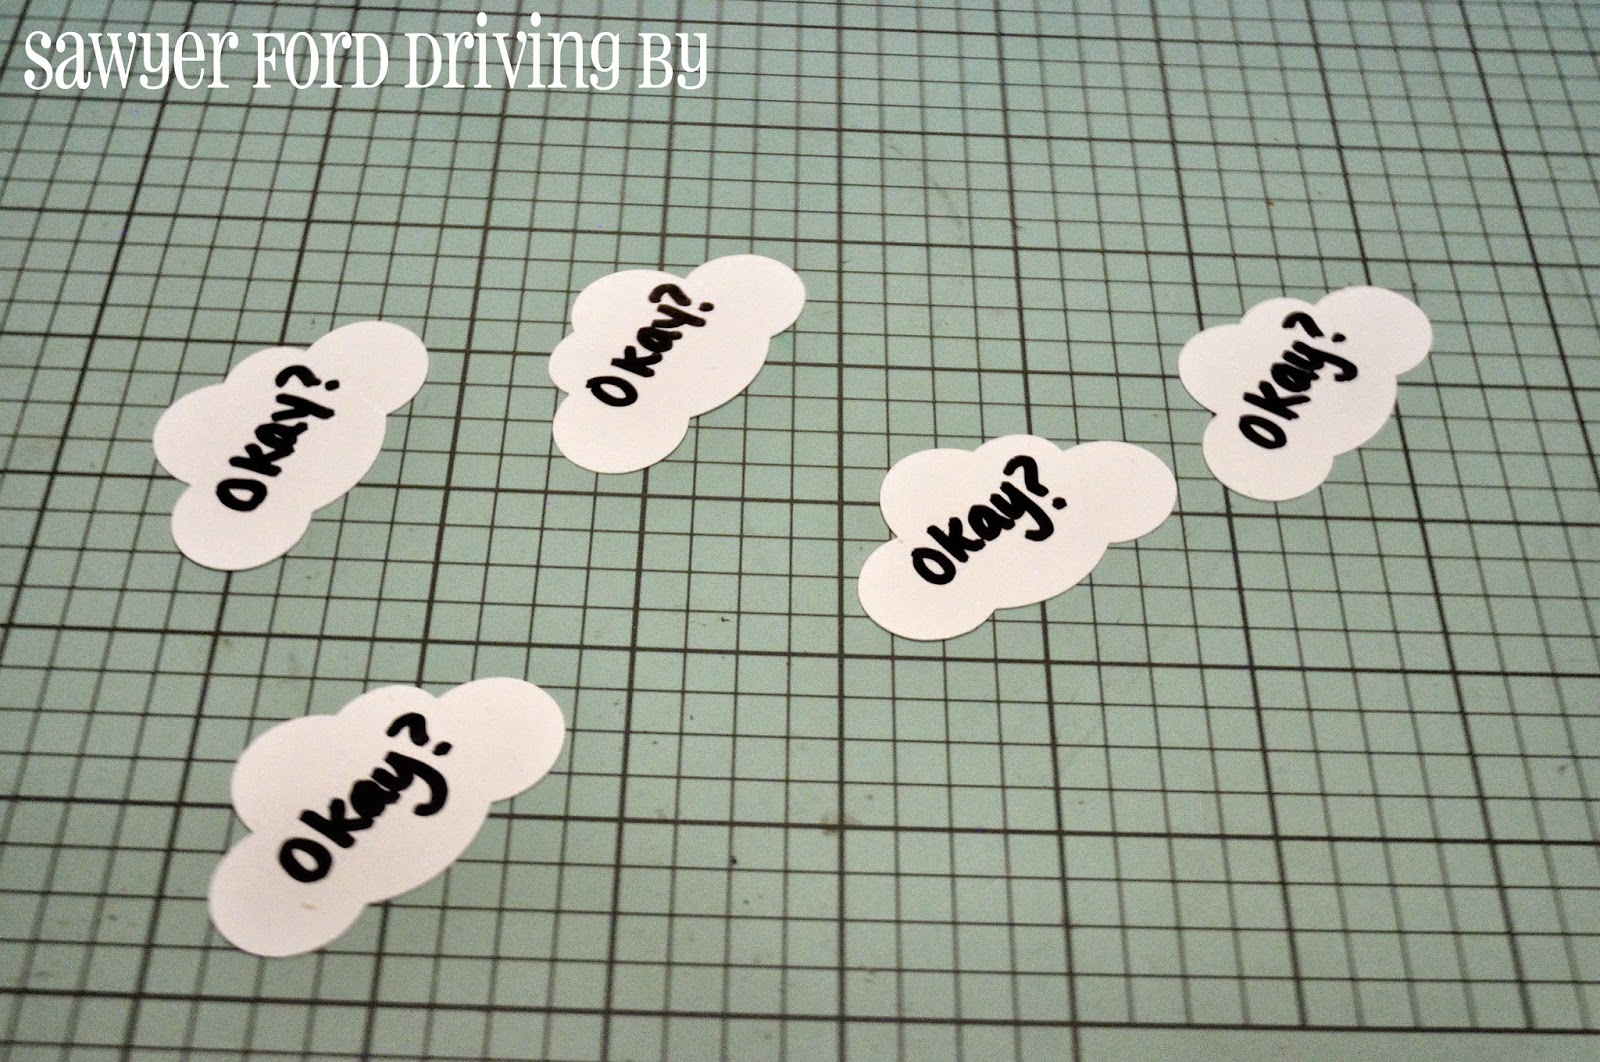

Now take your black clouds and, using a silver Sharpie, write {Okay.} on each of them. You can write on either side. I chose to write on the rough side, because sometimes the shiny side tends to show a little scuffed after baking.

Now we're going to punch the holes for our jump rings. When you bake Shrinky Dinks, any holes shrink right along with the rest of it. For the tiny jump rings I'm using, a 1/8 inch punch makes a hole that shrinks to just the right size, but if you only have bigger jump rings, you might want to use a 1/4 inch hole punch. These are the holes you will punch for each pair. You can click on the picture to make it bigger if you have a hard time reading it.


Once you have your holes punched, place your clouds writing side up on a piece of paper on a cookie sheet. I usually use a lunch sized paper bag.


Slide them in the oven to bake, checking them after about 90 seconds. At that point mine were still curled up a bit, but a few seconds later they were all lying flat, which is how you know they're done.


When I take Shrinky Dinks out of the oven, I press them quickly with an acrylic stamp block, just to make sure they're all nice and flat.


See how much smaller they are? 


Now we're going to attach our findings. Here are the findings you'll need for each pair. Again, click the picture to make it bigger if you need to.


For the first pair, just glue your earring posts right to the back. You will be using one white cloud and one black cloud, both hole-free. I actually just used high temp hot glue for these, and they've held up fine. Taylor has worn them several times and they're still holding fast. But you can absolutely use something like E6000 if you prefer. Just make sure you let them sit for the instructed amount of time before wearing.


Add your earring backs and you're done!


For the next pair, you're going to use a jump ring to attach a black cloud with a hole punched in the top to a white cloud with a hole punched in the bottom. Repeat for the other earring. 


Now glue your posts to the backs of the two white clouds and add your earring backs.  Done!


For the last pair, attach your black and white clouds together like you did on the last pair, then carefully open the loop at the bottom of your earring hook with a pair of round nose pliers. 


Loop it  through the hole at the top of the white cloud, making sure to put it on so that the clouds will face front when you wear them. Carefully squeeze the loop closed with flat or needle nosed pliers, being careful not to crush it. Repeat for the other earring and attach the backs. All done! Now you'll be the envy of your book club!


I had so much fun making these that I whipped up another couple of pairs using different punches I had. These were made with a Fiskars Large Cupcake Squeeze Punch. Aren't they fun?


And the other day I found this retired Stampin' Up ornament punch for $2.99 at the thrift store they just opened up practically walking distance from my house! Score! (On both the punch and the new thrift store!) It turns out there are entire Pinterest boards dedicated to all the things you can do with this punch. Seriously. I'm so excited! I punched 6 ornaments from frosted Shrinky Dinks and colored them with pastel Sharpies. They turned out with this cool stained glass effect, and I love them!


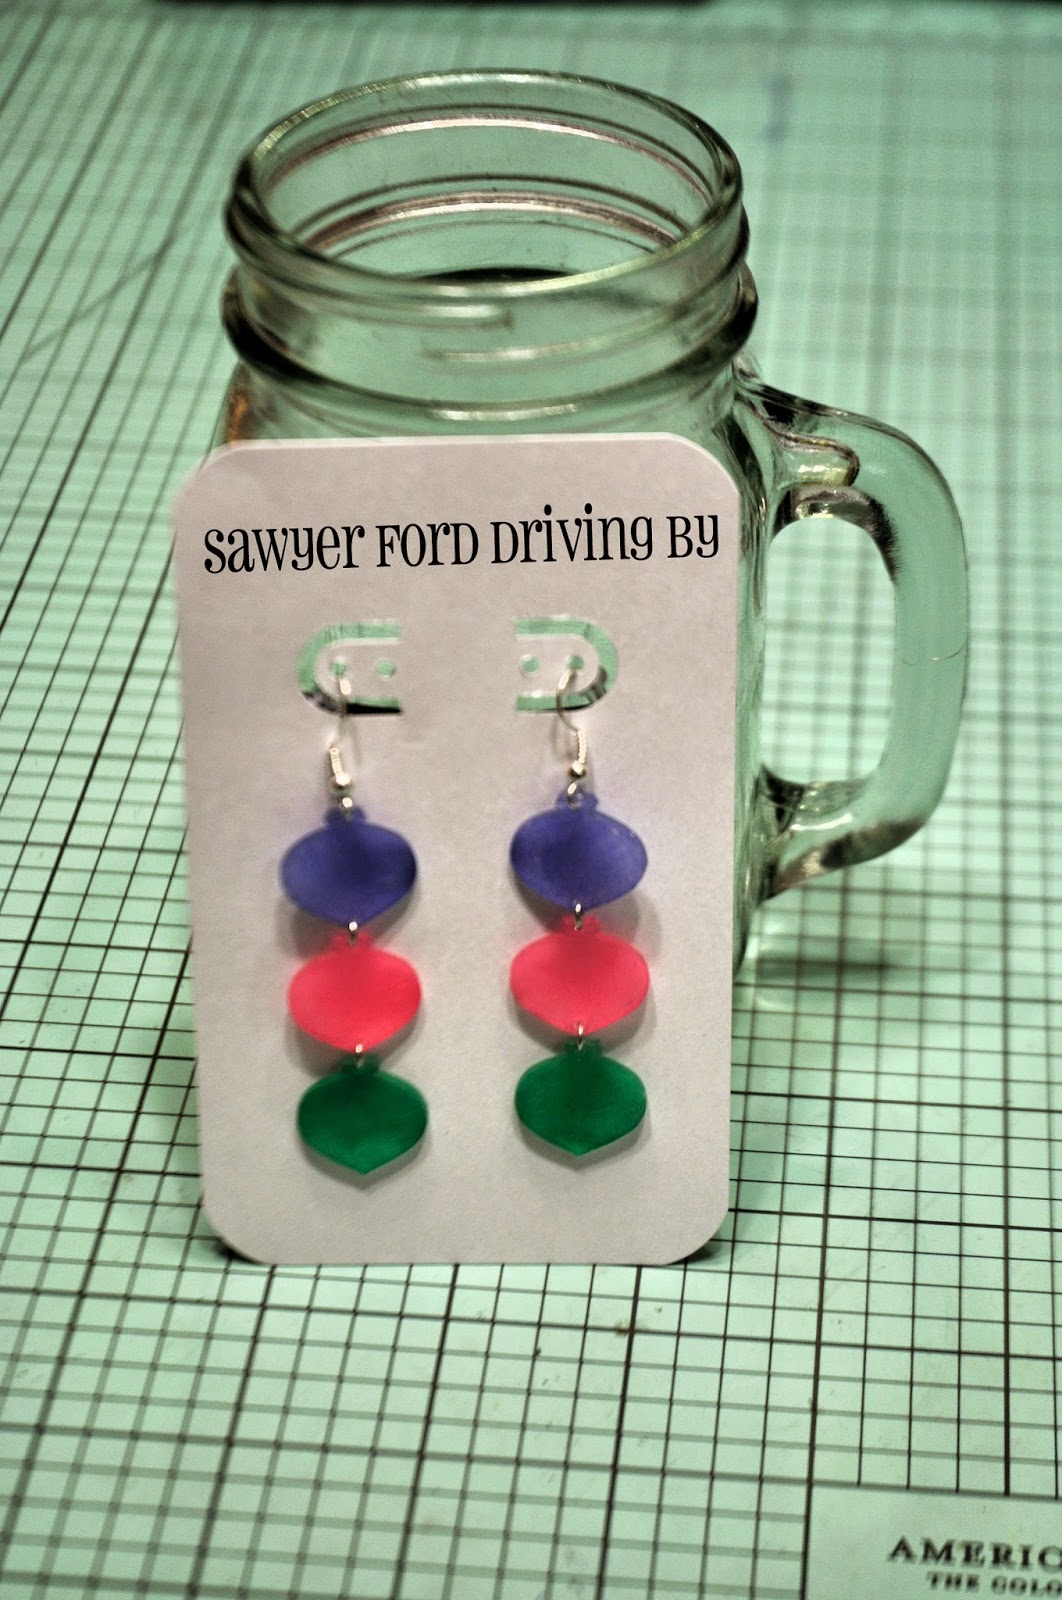

I may end up going over the edges with a silver paint pen as well. I haven't decided yet. I love how many options there are with this craft! Shrinky Dinks are always a winner around here!


Thursday, October 16, 2014

Lily's 5th Birthday Party

On the 11th we had a birthday party for Lily at the Life Center at our church. We've always had small family celebrations for her, but this was her very first friend party, and it went so well!

We went with an Adopt-A-Baby theme, and it was easy breezy to put together. Now here's the part where I realize that I am ridiculous and forgot to get a picture of the the baby table before all the adoptive mothers descended on it. These two are the sum total of the pictures I got before the babies were all passed out.


But here's what they all got: a baby, two felt diapers, a blanket, a diaper bag, a gown, a felt bib, a baby bracelet, a pacifier, a baby headband, and a baby bottle.


The babies were collected over the last few months from various thrift stores and lovingly (and thoroughly) cleaned. What I loved about this (beyond the cost effectiveness) was that each baby was unique. Because there was a range of sizes, I made the diapers specifically for each baby. I just free-handed a couple of sizes based on baby diapers we already had, and made each baby one solid color diaper and one print diaper. They closed with Babyville plastic snaps.

I bought a pattern for the gowns (Simplicity 1937), and my mom sewed up the gowns using vintage fabric. The pattern was for a 15 inch doll, so for the smaller dolls I just flipped the gowns inside out and moved in the seam allowance. I added Babyville snaps to each gown to close it up the front.


The bibs were just cut from a couple of free-handed paper patterns and also closed with a Babyville snap.

I got the pretty ruffled elastic for the headbands from Tuesday Morning, and each headband had a different embellishment, some handmade, some purchased, all of them from my stash. I also made my sweet niece Adelaide one to match. :)

My mom made the blankets from fleece and flannel, and she found the diaper bags at the Dollar Tree. The bracelets were leftover cupcake embellishments from a baby shower, and the bottles and pacifiers came from the Dollar Tree as well.

There were a few boys there too, and they got to choose from an assortment of stuffed animals since baby dolls weren't really their bag. :) The boys who were big enough got to make Shrinky Dink name tags for their chosen animals while the girls played with dolls, and we tied them on with leather cord.


Since a lot of the accessories were crafted from materials already on hand, I think our total outlay for eight babies and accessories was about $30, or less than $4/each for what was a stunningly successful party favor. I saw a number of the adopted babies make an appearance at church the next day. :)

The animals cost even less, since I averaged about 50¢ each for those, and the Shrinky Dinks and leather were things I had in my stash.

There were no formal games at the party. What I did instead was cart in all our big baby doll items, including 3 beds, 2 bath tubs, a baby changing station, 2 cradles, a high chair, a bouncy seat, and numerous baby accessories. My mom also brought in two dollar store doctor kits and a box of princess Band-Aids, the latter of which lasted about 17 seconds lol.


Levi wasn't interested in babies, but he did think he might like a nap!

My mom graciously did the decorating and the food, and I couldn't have made the party happen without her! She made some delicious pudding filled lemon cupcakes, and supplemented them with store-bought Sofia the First cupcakes and a small sheet cake to hold the all important Number Five Birthday Candle. She also made up some fun butterfly snack bags that had a different type of cereal in each wing, and little daffodil accented containers filled with fruit snacks. For drinks there were various fruit drinks with twist off tops, and pineapple-orange cream punch - yum!


Lily was so blessed with all the gifts she received, and she was thrilled with them all! I loved watching her enthusiasm, whether she was opening a giant Frozen themed pen from the Target $1 Spot from her dad and I or an awesome Queen Elsa doll from my cousin Maggie, who always spoils me and mine rotten. :)


She had plenty of helping hands to assist in opening the gifts lol.


Aunt Rachael made her this gorgeous lace crown, and one other, along with a beautiful lace trimmed pink gown. I got pictures of her opening the other gifts, but things were moving so fast that I'm afraid they were a bit blurry.

This party was so much fun, and it thrilled my heart to get to see how engrossed all the kids were in playing! A huge thank you to everyone who came and played along!

Tuesday, August 5, 2014

Vacation Bible School: Shrinky Dink Key Chains

Oh my goodness! So over two weeks have flown by since I've posted - sorry about that. It's been a very busy couple of weeks! We just got back from an amazing week in Texas with family, which came hot on the heels of VBS week. My last post was right before Vacation Bible School, where I was in charge of the crafts! I had some awesome helpers, and we had so much fun!

The first day we did Shrinky Dink key chains for every single class from ages 4 up through 18. They all loved them, and even our workers got in on the fun! Have you ever played with Shrinky Dinks? They are awesome!
A quick breakdown if you don't know what they are:

Shrinky Dinks are thin sheets of plastic that you color or stamp to decorate, then bake. In just a few minutes, your shape will shrink to 1/3 of its original size and thicken to 9 times its original thickness. Your colors will be brighter and more vibrant, and you will have a nifty little key fob, name tag, pendant, zipper pull, etc.

They come in several different versions: shiny clear; opaque black, white, or brown; or translucent sheets that are shiny and smooth on one side and rough on the other side. These last ones are called Rough and Ready (snort!), and they are the ones we went with. You can buy a 50 pack of these for $22 from the Shrinky Dinks website, which is much cheaper than buying a 10 pack at the craft store, if you need a bunch that is. On the shiny ones you need to use either permanent markers or a StazOn ink pad, which is fine, but not really the best idea for kiddos, especially ones you need to send home to their parents with unstained clothes. But the Rough and Ready sheets are the perfect surface for coloring with good old color pencils.

I cut each sheet in fourths, then used a corner rounder punch to round the corners so they wouldn't be sharp when they baked up. Then I gave each kid two and let them color whatever they wanted. When they were done, I used a standard hole punch to place a hole wherever they chose. After VBS was over for the night, Nick and I baked them all.

To bake, preheat your oven to 325°F, then lay a flat piece of parchment paper or lunch sized paper bag on a cookie sheet with one corner turned up. This will allow you to lift the baked Shrinky Dink off the hot pan without burning yourself or bending the flat shape. Lay your colored pieces ink/pencil side up and bake for 90 to 180 seconds. You really want to start watching through the oven window at about 90 seconds. Your shape will curl up as it shrinks, then flatten back out completely, which is how you know it's done. Occasionally larger pieces may stick to themselves (which is why you need to watch). If that happens, I've found that the easiest and safest way to unstick them is with a couple of forks. Just kind of gently work them apart, then let the piece finish baking. After I take the pieces out of the oven, I like to press down on them for a few seconds with a large acrylic stamp block to really make sure they are flat. Really anything flat that's larger than the surface of the shrunken piece will work for this.

This was one of my favorites:


I love that this sweet little 7 year old girl drew the happy little sun and butterfly and cross and then plopped a black widow spider right down in the middle of it, lol.

Here are some Shrinky Dink necklaces Sawyer, Lily, and my nephew Max made when he came to stay with us in May. I might have helped a little with the Jays one ;).


The rest of the VBS week included paracord bracelets and keychains, painted wooden magnets, finger painting (for the littles), pom pom caterpillar clothespin magnets (also for the littles), decorated teddy bear banks, Scupley magnets, and some really neat copper and leather stamped bracelets that I'll have a tutorial on coming soon.


Right now I'm off to fill an Etsy order and hit the sack!