Showing posts with label blanket. Show all posts

Friday, October 23, 2015

Poking my head up...

I've been trying to post for like a week now, but I'm sick, and it just seems like by the time I finish all the necessary tasks like feeding the kids and putting on pants, I have nothing left in me. It's nothing terribly serious, just a sore throat, but I'm on antibiotics now, so hopefully it's on its way out.

So here's what's happening. We have a contract on the house. Yay us! Actually, we had a contract before this one, but the buyer backed out because the inspection turned up some foundation damage. Boo! BUT, we are getting it fixed in 10 days, with a lifetime transferable warranty, so it shouldn't be an issue. Even with that, the first buyer didn't want to stay on board. Fortunately, he'd been in a bit of a bidding war with another buyer, and they were happy to take his place with the assurance that the foundation work is being done.

So now the race is on to find our next house. We found one that we really liked, but it sold the day before the contract went on ours. And we've since found one that we really love, but there are some issues with it that would have to be resolved for it to be an actual option for us. It's all very much up in the air from our viewpoint, but God has definitely been moving and providing, so we will see what happens.

So as far as crafting goes, there's been a little bit. Not much, but a little. And I don't have any tutorials for you right now, but here are a few things I've made.

Back in July a little girl at our church had a birthday, and I made her this fun candy colored paracord bracelet and earrings set. The bracelet actually ended up being a little small for her, so I made her a bigger one and she sent this one back to Lily.


My friend Melissa just had her gorgeous baby girl MacKenzie. Her nursery is done in gray and yellow with accents of teal in an elephant motif. So back in August for her baby shower I made her a few gifts. First was this paper banner with bows made using my Sizzix Bow Die.


I found this yellow and gray photo box at Hobby Lobby to put it in for gifting, and she can use the box in baby girl's room.


I made her a couple of curved burp cloths out of white terry cloth and this super soft cuddle minky.


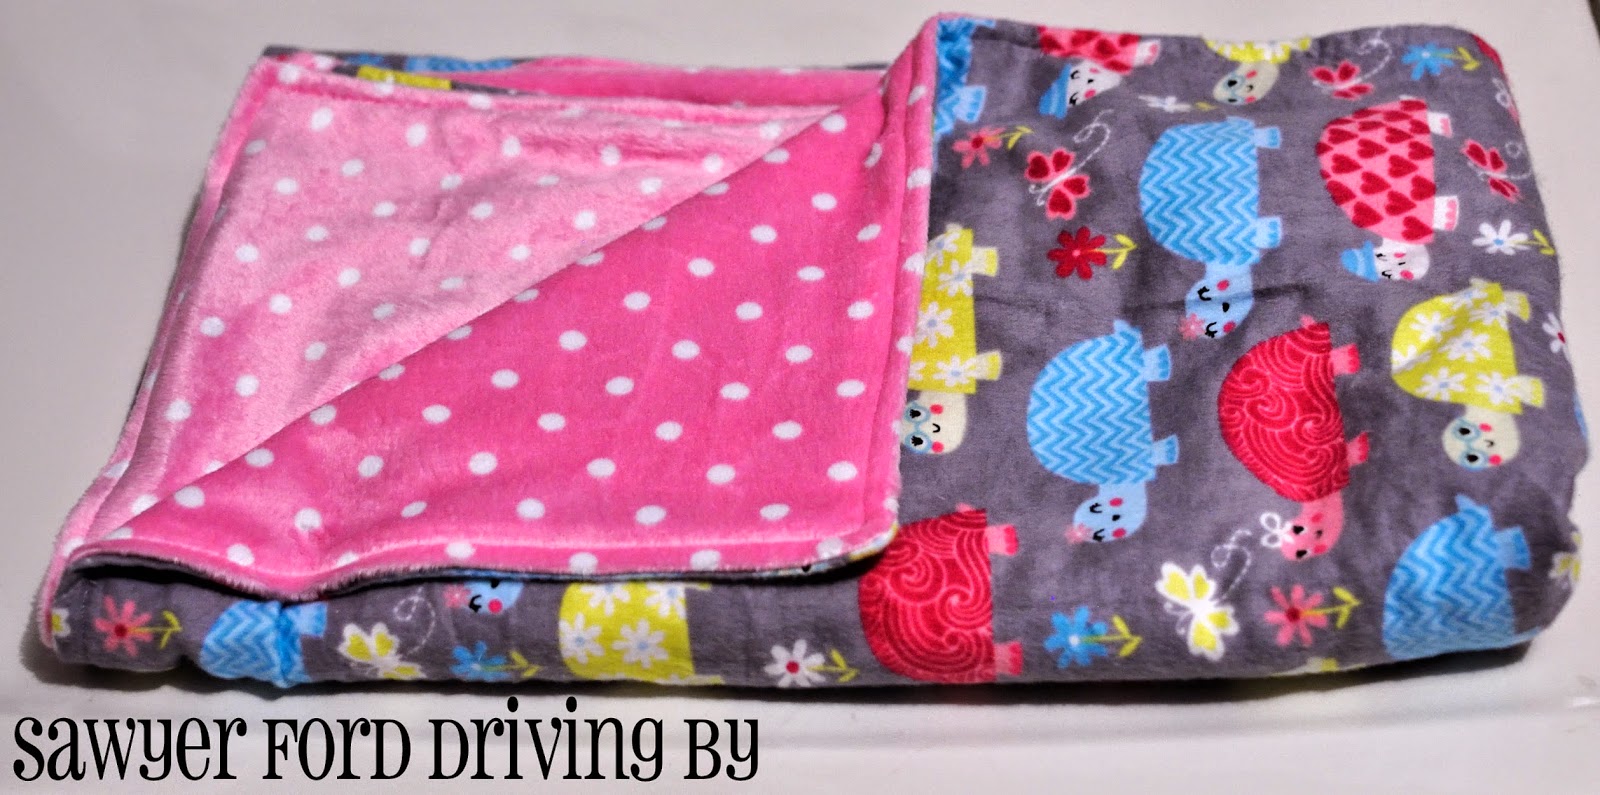
And I also made her a faux chenille blanket. I'll be honest, I wasn't entirely happy with how the blanket turned out. The blue looked more teal in the store, and I should have used it as the one of the chenille layers and not the base fabric on the back. I should have sewn the lines half as far apart so the chenille strips would have been more even and stuck out less from the blanket. But it's still super cuddly, and she said she loves it.


My mother-in-law Brenda's birthday was also in August, and I made her this card.


It's very simple, but I like it. I'd really like to get into making cards on a more regular basis. I've got stamps, stamp pads, and embossing folders for days, but not much of a place to do it right now. And most of my stamps and ink pads are in storage right now anyway. When I get a craft room one of these days I plan on making up a bunch of different elements and having my girlfriends/sisters in law over for a card making party.

I also made Brenda this pretty patchwork zipper pouch.


The mint fabric was a duck cloth remnant from Hobby Lobby I think, and the coral polka dot fabric was from a pair of pants in the giveaway pile. I made my Mom a very similar one for her birthday in July.

Inside the pouch for Brenda I included this simple bead and chain set I made with these awesome metal filigree beads I got on clearance at Hobby Lobby.


We also had another Walridge Baptist Church Ladies Craft Meeting last month, but that one deserves a post of its own.

We could really use your prayers that God will show us to the house He has for us and that everything will go smoothly with the sale/closing on our own house. It looks like the timing may end up pretty tight on it - for us to close on the new home the same day as we close on the old home we will have to find the right house and have an offer accepted in the next week or so. Exciting times, people!

Thursday, July 17, 2014

Presser Foot Series: Walking Foot


Hello all! It's time for another installment of our Presser Foot Series! Today we're talking about the Walking Foot. The walking foot looks a bit more complicated than most presser feet, but it couldn't be simpler to use.


This is not a snap on foot. If your machine has a snap on adapter, you will need to unscrew it to install the walking foot.


There is an arm that raises, and you will want to fit the bracket at the end of it onto the bar you see protruding to the right of your needle.


And of course you will need to attach the side bracket around the main post and secure it with the screw that was securing your snap on adapter.


The way a walking foot works is pretty simple. Basically the arm at the top operates the levers inside the casing and they move these little white plastic grips that fit inside the grooves in the front of the foot. 


This gives you a set of feed dogs on top that move at the same speed as the ones on the bottom, and together they all work together to move your two (or more) layers of fabric under the needle at the same speed without shifting.

This foot is AMAZING for sewing multiple layers, like you would do for quilting straight lines or making faux chenille. It's also amazing for sewing with slippery fabrics like minky.

For Christmas I made my month old nephew Lawrence a cuddle blanket from flannel and dot minky. I wish I could show you a better picture of it, but all those photos are on a hard drive that's out of reach for the moment, so you'll have to settle for this cell phone pic of Nick holding him wrapped in it just after the New Year.


Now he's almost 8 months old, and it's become the blankie, much to my delight. It was such a simple project that it doesn't really call for a tutorial, but I'll give you a basic point by point:

  • Wash and dry both fabrics to prevent uneven shrinking after sewing.
  • Cut both fabrics to the same size. Honestly I didn't measure, I just squared the edges of one fabric and cut the other to match, but I believe it was approximately 45" (width of the bolt) by 54" (yard and 1/2).
  • Place fabrics right side together and pin.
  • *Optional* Round your corners by using a plate as a template and cutting around it with scissors or a rotary cutter.
  • Sew almost all the way around, leaving approximately 3-4 inches open on one side for turning.
  • Clip your corners and turn your blanket right side out.
  • Make sure your corners (if you have them) are well turned.
  • Tuck in the seam allowance on the opening you left and pin closed.
  • Topstich around the entire blanket, closing your opening.
  • Done!
At the beginning of May we had another sweet little addition to the family, this one born to Nick's sister Rachael, who just so happens to be married to my brother Cary. :) Precious Adelaide joined us after a longish line of grandsons, and I was tickled uh, pink to get a girl to sew for! Not that boys aren't fun too, but hello ruffles and bows!

Anyway, I finally got a chance to make a blanket for her too. These are the fabrics I went with.


I made this blanket at night after the kids were in bed, and I had to deliver it the next day, so I didn't have a chance to take it outside and hang it up for pictures, but I was able to snap a few inside.


It's not perfect, but it's very soft and cuddly, and the minky was SO much easier to sew using the walking foot!

Cuddle fabrics are generally on the pricey side, so I snap them up when I find them in the remnant bins, which is where I scored the sweet pink and white polka dot I used here. It was a serious win to find a remnant this large, and I had so much fun picking out a coordinating flannel, because I knew right away what I wanted to do with it.

A few weeks ago I found a yard and 1/2 of this fluffy orange Ultra Cuddle, and I paired it with this fun robot flannel. I made a blanket for Sawyer from them, and now he has to have his "Wo-bot" before he goes to bed. :) Again, sorry for the night time kitchen photography.


I also made one for Taylor back at Christmas from orange and white chevron flannel backed with aqua cuddle fleece, but right now she's wrapped up in it asleep. :) I guess I'd better go back through my remnant bag to find something to make one for Lily too!