

One of the most beloved parts of both book and movie is the gentle banter between Gus and Hazel where they have a hard time hanging up the phone and keep stretching out the conversation with "Okay?" "Okay." "Okay?" "Okay."....and it becomes their thing. Their always.

I've seen all kinds of memes and pictures all over the internet honoring that little word, not to mention tons of accessories, many of them DIY. So I thought I would try my hand at a project of my own. I asked Taylor to give me a hand, and together we made up three styles of TFiOS themed earrings.

For this easy project I pulled out one of my favorite crafting materials: Shrinky Dinks. I used a sheet of the frosted and a sheet of the opaque white. Before you get started on cutting out your clouds, turn your oven on to 325° to preheat. Now, to cut out the clouds I used a Fiskars X-Large Cloud Squeeze Punch. You can totally cut these out by hand if you don't have a cloud punch. In fact, my first version of this was a set of best friends backpack tags I cut out by hand for Taylor and her bestie, and they disappeared immediately. But they were about 3 times the size of the earrings, and my cutting skills on anything small are highly suspect.

I'm going to show you the steps to make all three pairs of earrings at once. Of course if you just want to make one pair, just follow the directions for the pair you want. The first pair will require one cloud punched from each sheet, and the second and third pairs will each require two clouds cut from each sheet. So to make all three pairs, cut 5 clouds from the opaque white and 5 clouds from the frosted. A quick note: I made all my earrings with the white cloud on top and the black cloud on the bottom. Apparently this is backwards. But this is my blog, so nyah, nyah, nyah, nyah, nyah! If you want to make them the "right" way, just switch all the black and white clouds in the instructions. No biggie.


Imagine you see 5 frosted clouds here too. You'll see them in a minute.
Take your 5 frosted clouds (see?) and color them completely with black Sharpie. Color on the rough side. Taylor helped me with this.


Let these dry for a minute, and in the meantime take your 5 white clouds and use your black Sharpie to write {Okay?} on each one. Write it as neatly as you can, but you're going for a handwritten look here.
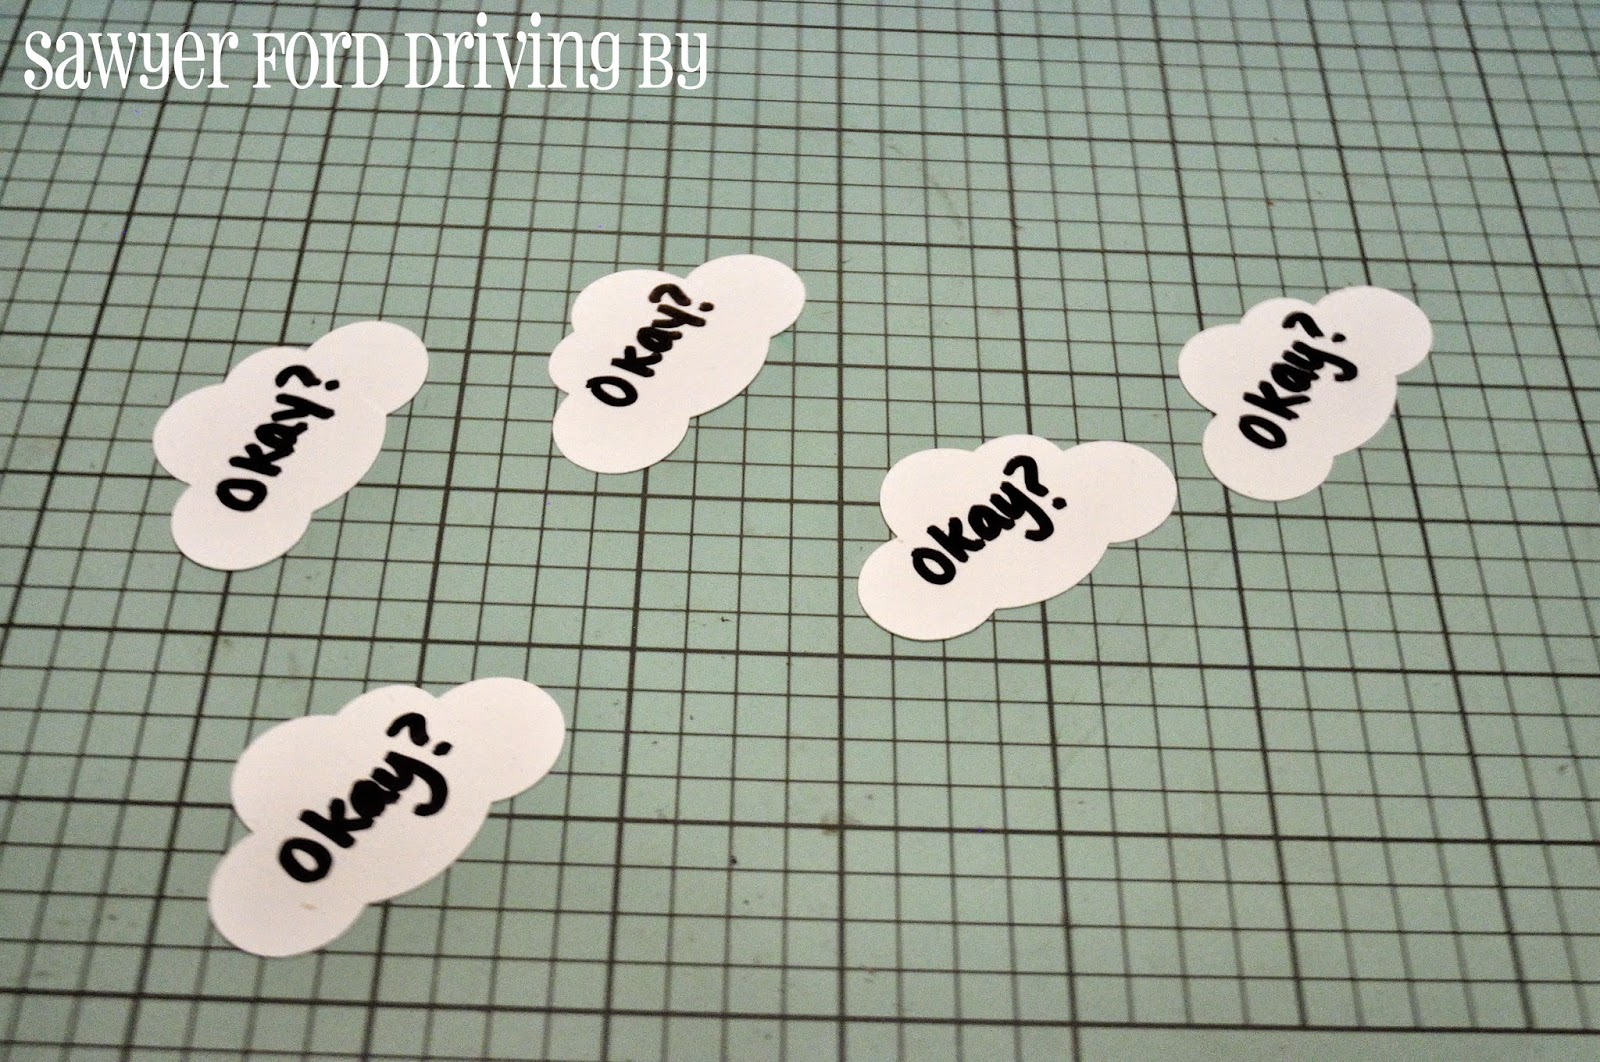
Now take your black clouds and, using a silver Sharpie, write {Okay.} on each of them. You can write on either side. I chose to write on the rough side, because sometimes the shiny side tends to show a little scuffed after baking.
Now we're going to punch the holes for our jump rings. When you bake Shrinky Dinks, any holes shrink right along with the rest of it. For the tiny jump rings I'm using, a 1/8 inch punch makes a hole that shrinks to just the right size, but if you only have bigger jump rings, you might want to use a 1/4 inch hole punch. These are the holes you will punch for each pair. You can click on the picture to make it bigger if you have a hard time reading it.


Slide them in the oven to bake, checking them after about 90 seconds. At that point mine were still curled up a bit, but a few seconds later they were all lying flat, which is how you know they're done.


When I take Shrinky Dinks out of the oven, I press them quickly with an acrylic stamp block, just to make sure they're all nice and flat.

See how much smaller they are?

Now we're going to attach our findings. Here are the findings you'll need for each pair. Again, click the picture to make it bigger if you need to.

For the first pair, just glue your earring posts right to the back. You will be using one white cloud and one black cloud, both hole-free. I actually just used high temp hot glue for these, and they've held up fine. Taylor has worn them several times and they're still holding fast. But you can absolutely use something like E6000 if you prefer. Just make sure you let them sit for the instructed amount of time before wearing.

Add your earring backs and you're done!

For the next pair, you're going to use a jump ring to attach a black cloud with a hole punched in the top to a white cloud with a hole punched in the bottom. Repeat for the other earring.

Now glue your posts to the backs of the two white clouds and add your earring backs. Done!

For the last pair, attach your black and white clouds together like you did on the last pair, then carefully open the loop at the bottom of your earring hook with a pair of round nose pliers.

Loop it through the hole at the top of the white cloud, making sure to put it on so that the clouds will face front when you wear them. Carefully squeeze the loop closed with flat or needle nosed pliers, being careful not to crush it. Repeat for the other earring and attach the backs. All done! Now you'll be the envy of your book club!


I had so much fun making these that I whipped up another couple of pairs using different punches I had. These were made with a Fiskars Large Cupcake Squeeze Punch. Aren't they fun?


And the other day I found this retired Stampin' Up ornament punch for $2.99 at the thrift store they just opened up practically walking distance from my house! Score! (On both the punch and the new thrift store!) It turns out there are entire Pinterest boards dedicated to all the things you can do with this punch. Seriously. I'm so excited! I punched 6 ornaments from frosted Shrinky Dinks and colored them with pastel Sharpies. They turned out with this cool stained glass effect, and I love them!


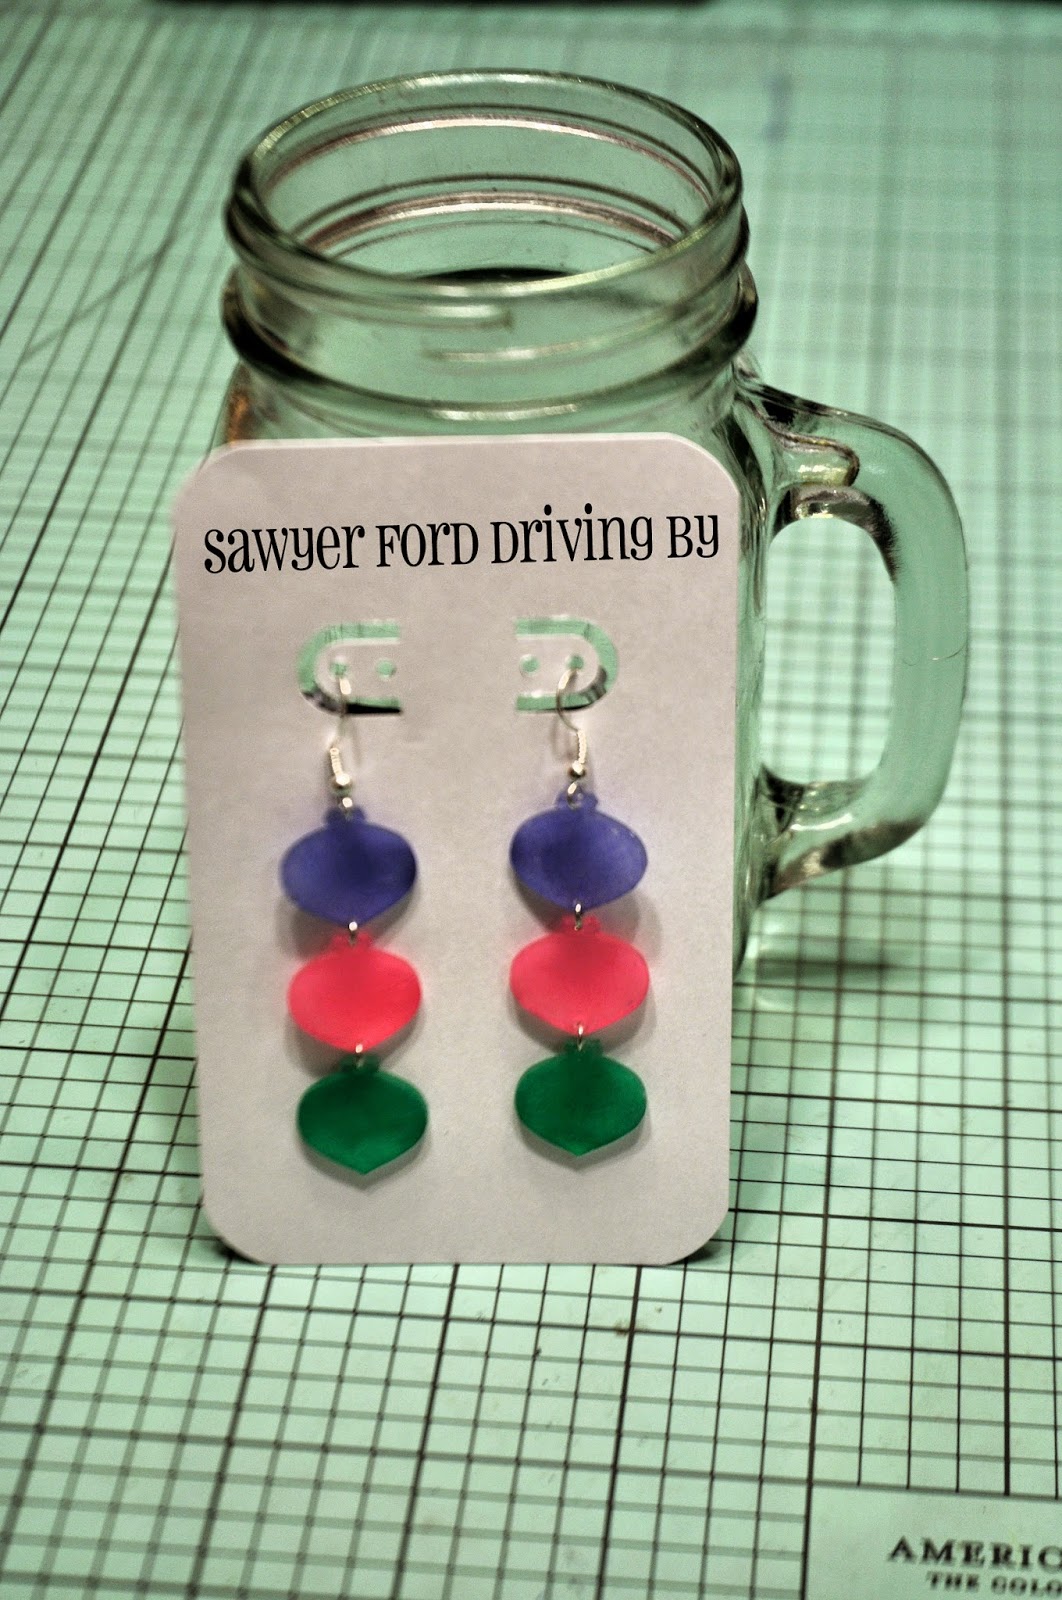
I may end up going over the edges with a silver paint pen as well. I haven't decided yet. I love how many options there are with this craft! Shrinky Dinks are always a winner around here!
No comments:
Post a Comment