Showing posts with label punch boards. Show all posts

Thursday, October 6, 2016

Early Fall

Okay, a reasonable person might be expected to believe that I had dropped off the face of the earth. In reality, the settling in to the school year along with various other unexpected occurrences has hit us like a freight train and blogging has gotten pushed to the back burner. But I'm here now! So I hope you're ready for some pictures, because I've got a few to share.


This is a little half octagon table Nick and I refinished. Okay, it was way more him than me, but I helped a little. I am so terribly sad that I didn't get a picture before he started tearing it apart, but trust me, it was UH-GLEE. Think sea foam crackle paint all over, and the veneer on two of the doors was badly damaged. That's where he really impressed me - he smoothed it all out with Wood Bondo, and you can't even tell it's not original. The top was in good condition, so we just stripped, sanded, and stained it. We used a Rustoleum stain in Kona.


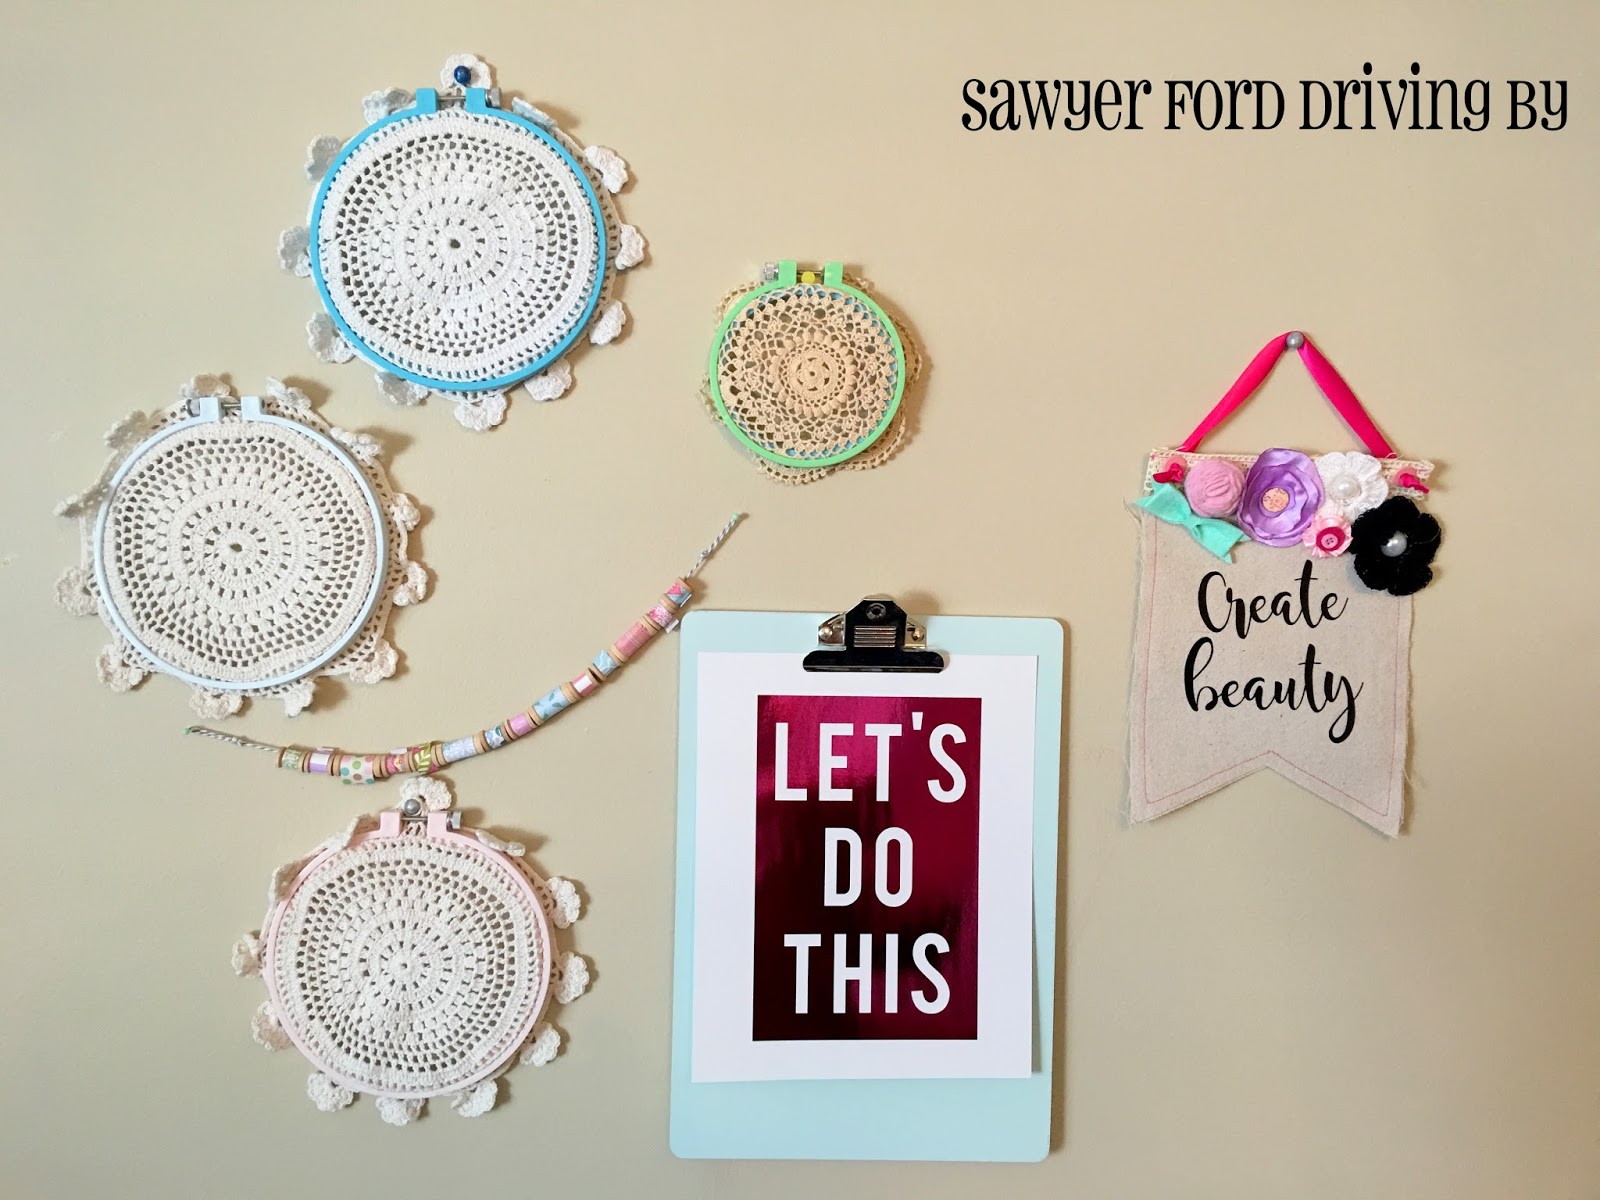
I shared this image over on Instagram. These lovely little banners were inspired by the one made by the adorable Bethany at Pitter & Glink. I made a cardstock template for my banners using my We R Memory Keepers Banner Punch Board, then cut two for each banner from dropcloth. I machine stitched them together with pink thread, then cut the words from htv using my Cameo. The font I used was Magnolia Sky, which is free for personal use. The flowers and bow are a variety of purchased and handmade pieces. I punched holes in the corners and added eyelets using my Crop-a-Dile Punch and Eyelet Setter, threaded in some random satin ribbon I had on hand, and knotted the ends on the front. On the back of each banner I hot glued a wooden skewer cut to size along the top to keep the banner hanging straight. The Create Beauty banner is hanging in my craft room (as pictured below), and the Be Kind is part of Lily's gallery wall.


So this happened in late August. Sawyer wasn't feeling well at all and we couldn't get a doctor's appointment, so I took him to the ER. By the time we got there he was having some breathing distress and they ended up keeping us for two days. We never did find out exactly what the problem was, but the best guess was that he had a virus combined with an allergic reaction to something that really hit him hard. Below is a picture of him hanging out with his buddy Chase, who brought him Play-Doh, cars, and snacks and spent some time looking suitably impressed with Sawyer's grand tour of his hospital room.


Nick works for Lexus and they sent him this amazing gift basket, which was such an awesome thing for them to do!


Nick's cousin got married last month, and we stayed at an amazing chalet near the wedding venue where they had this gorgeous handmade quilt on the bed. I'm in love!


We got to see Nick's sister Kristin and her family, which was awesome. They live in Texas, and it had been over a year since we'd seen most of them. It was so much fun to get the kids together with their cousins!


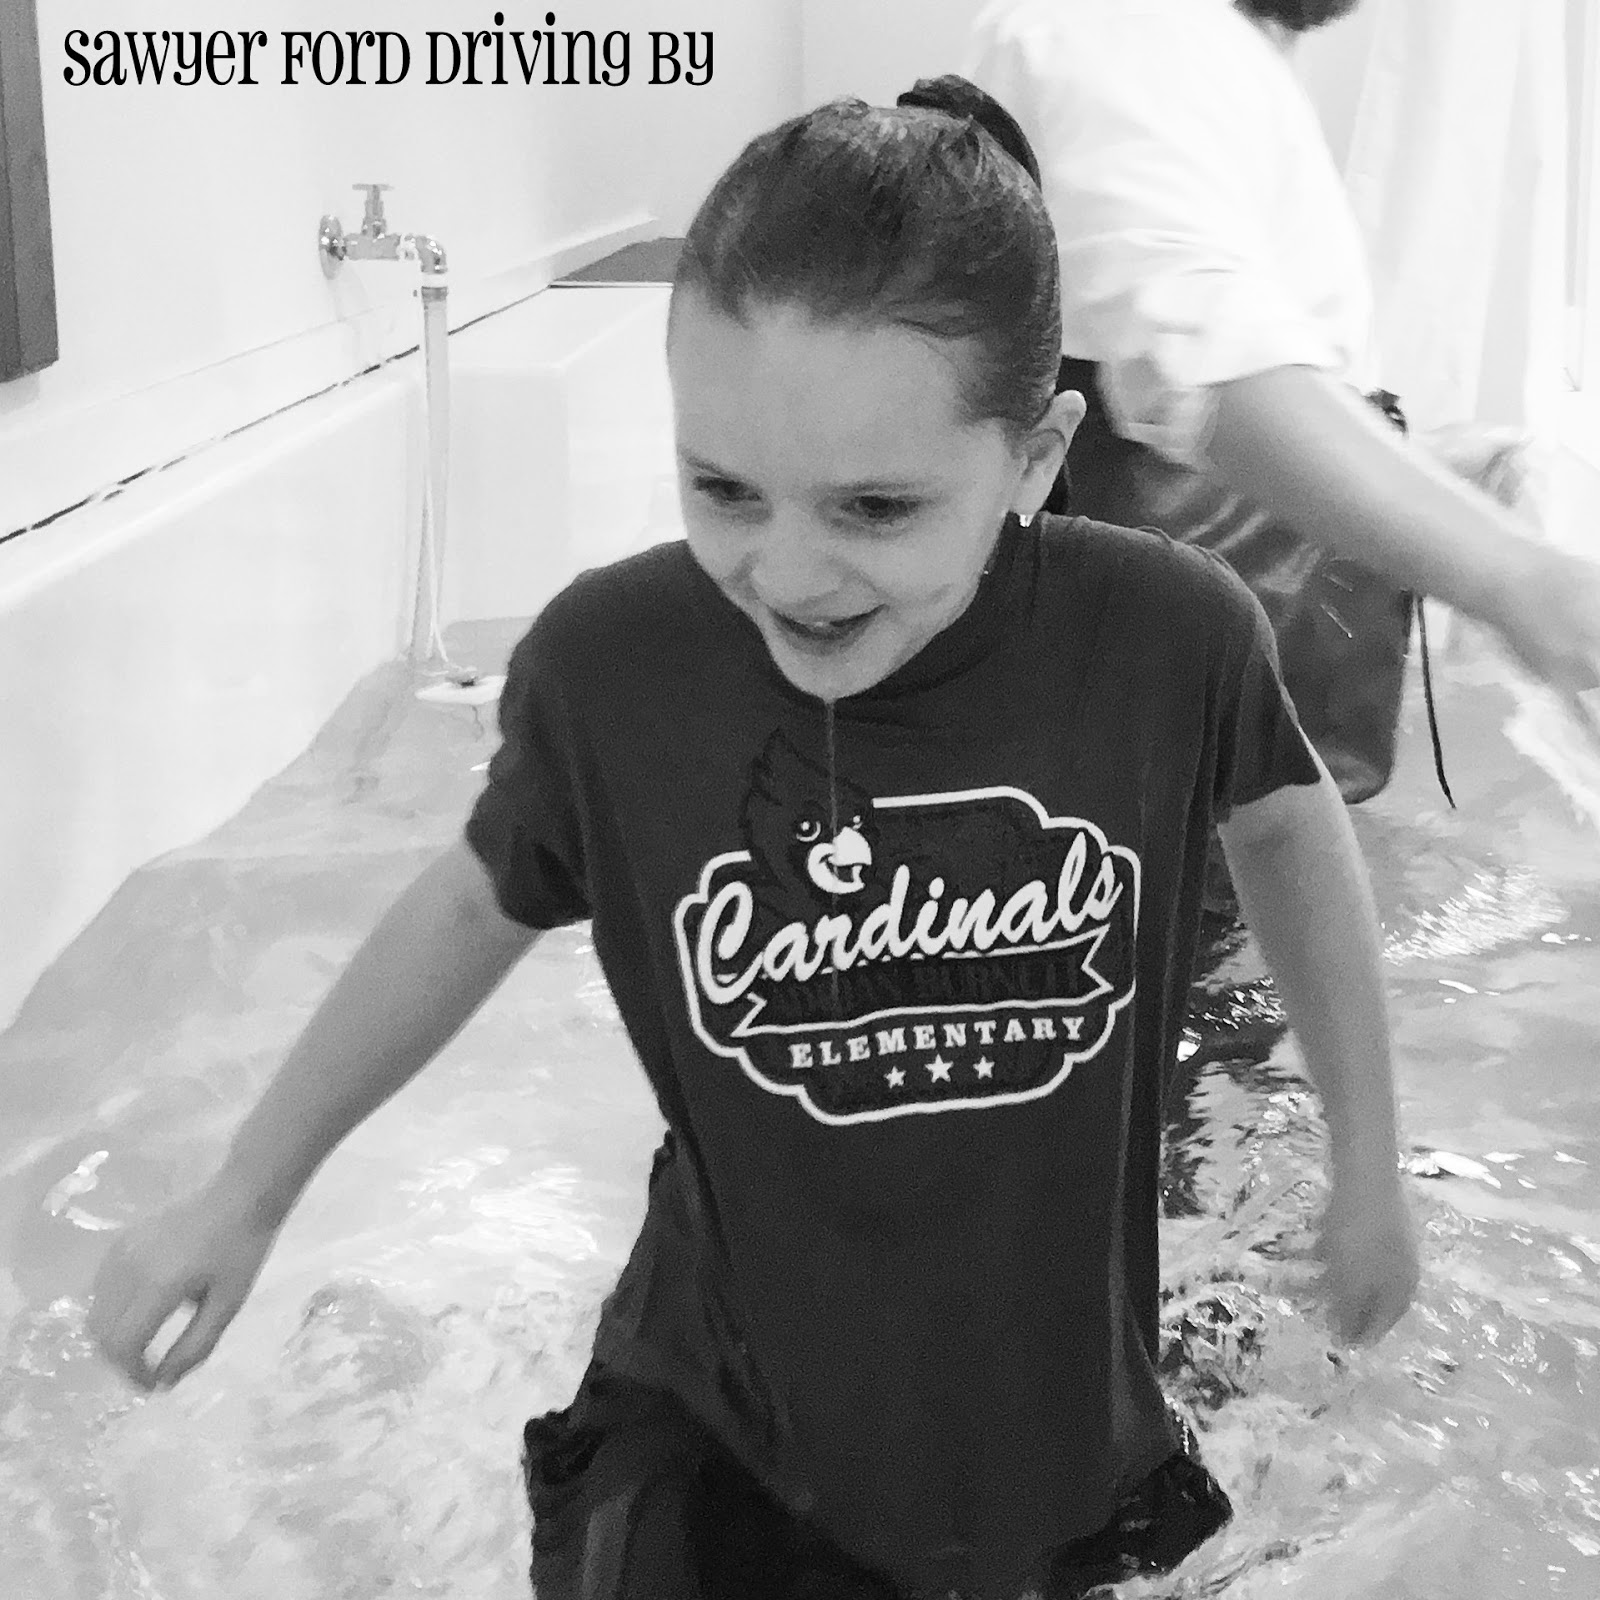
Our Lily girl got baptized a couple of weeks ago, and she couldn't have been more precious.


So those are a few of the things that have been keeping us busy lately. What have you been working on?

*There are no affiliate links in this post. I have not been compensated for using any product mentioned in this post. I just like to share what I have used in case you might want to use it too!

Wednesday, March 11, 2015

We R Memory Keepers Gift Box Punch Board

Hi, guys. It's been...busy...around here. Obviously by "around here" I mean around my house and not around here on the blog, because, well, I've had a few other things going on. Like putting down the last of the new flooring (in the kitchen) and painting ceilings (also the kitchen), and more painting, painting, painting, PAINTING (like, everywhere). We are slowly but surely getting there though. Just a few more little things and we will be ready to list.

So between that and the soul freezing winter weather Tennessee has been hit with lately, things have been a little uncrafty. But last night I finally had a chance to sit down and put together a post about one of my favorite crafty tools, the We R Memory Keepers Gift Box Punch Board.

First of all, I want to make a disclaimer - these pictures, guys, they're not my favorite. Late night crafting with incandescent lighting is almost always a bad combo, but we work with what we've got here. And my poor, poor kitchen table that is (somewhere) on the to-do list to get a makeover makes for a pretty lame backdrop. What's really sad is that my mom passed this table on to us several years back, and when she did she had just refinished it. Three kids, one crafting momma, and all the abuse of being a staging area during our house revamp has left it looking a bit worse for the wear. No judgment though, someday she'll have a fresh white coat of paint (if I have anything to do with it), and all will be redeemed.

So anyway, that out of the way, here's the Gift Box Punch Board.


My mom bought me this board for my birthday, and I love it! In fact, I bought my SIL Leah one for Christmas. Basically it makes a self closing box (no separate lid!) with one square of paper. And they can be made in a variety of sizes of course, depending on your starting paper size and the shape instructions you choose.

I started out with a 6x6 sheet I cut down from this fun Disney paper. I scored the whole 24 sheet pad at a local dry goods store for $1.99!


As always with the WRMK punch boards, the instructions are printed right on the board, and the score tool stores in a slot on the underside of the board, so there's nothing to keep track of.


I chose to make a 1.75 x 1.75 x 1.75 inch box. Based on that, here are the measurement instructions to follow.


Using this board is a lot like using the Envelope Punch Board - just punch and score. It's important to pay attention to the line instructions, because they may not both be the same depending on your box size. If your box is taller or shorter than it is wide, your start and diagonal lines will be different.


Start out by lining the left edge of your paper up with the appropriate start line, in this case the small (S) line.


Punch using the button.


Now score using the tool along all three score lines, the two lines leading off the button (follow the little guides trailing off the button to find the grooves) and the diagonal line.


Now rotate your paper 90 degrees to the left and repeat all steps.


This is what your paper will look like at this point.


Also, our paper is small enough to fit entirely on the punch board, but if you're making a bigger box, there is an arm that swings out to extend your score line surface.


Now, flip it over and do all the punching and scoring again.


Now you have two notches on each side.


Here you can see the score lines a little better.


Now insert each corner into the punch at the top of the button and punch again to cut the curved slits you will need to lock the box flaps together. It's very important to make sure your corner is well seated into the corner of the punch before punching, otherwise your slits will be off and the corner will not round well.


Just make sure you have the same side of the paper facing up during the punching of each corner. This is what it should look like at this point.


Go ahead and crease your scored lines, starting with the longest ones.


Now bring your sides up and crease the diagonal lines inward so they are toward the inside of the box.


You can leave these interior flaps as is if you would like the box to be able to be flattened back out when opened, but I like to adhere them with either glue or an adhesive runner. I find it easiest to go ahead and add the adhesive to all 4 sides before folding up the box.


If you look closely, you can see the lines of adhesive.


When folded up, they will adhere the interior flaps to the sides of the box.


Now you will gently hook the opposite flaps together using the curved slits we punched earlier. Be careful here as these can be easy to tear, especially if you used thinner paper.


All done! Isn't it cute? This size is perfect for gifting jewelry, or it would be just right for holding a cake ball or truffle at a wedding or baby shower. 


Since you can't see the date on that ring, we're going to say I graduated 5 years ago.


Here's one I didn't adhere the sides on. Okay, fine, I graduated in '95. Whatever.

I made a whole stack of these for Lily, who loves anything Disney. And now I'm kicking myself for not buying up all the cheapo paper stacks!


These are really cute using just about any paper. Here's one I made using some cool printed vellum I found at Tuesday Morning.


Oh, and how cute would these be in craft paper for a gender reveal party, with a pink or blue cupcake inside? So many possibilities! I can't get enough of these punch boards, and I can't wait to see if they come out with any more!

Monday, November 24, 2014

Pinwheel Punch Board


A couple months ago I heard that We R Memory Keepers was coming out with a new punch board: The Pinwheel Punch Board! I was so excited that I immediately emailed them to ask if they might be willing to send me one to review here on the blog. The very sweet lady who responded to me told me that they didn't currently have a budget for reviews on that product, but she would be happy to send me one to try anyway! I was so excited!


I got busy playing with it right away, but I wanted to wait until I could get a hold of a set of the pinwheel attachments before I told you all about it here. Unfortunately, once the punch boards hit the craft stores, the attachment sets were sold out everywhere I went. I finally found some in stock last time I went to Hobby Lobby, so I'm ready to show you how it works!


First of all, you can make pinwheels in many different sizes, using paper from 3 to 12 inches square. Today I'm going to show you one using 6x6 paper, which makes a pinwheel the same size you would normally find at the store. Of course you might ask, why not just go get one at the store for $1? Well, because those shiny numbers at the store can't complete with the gorgeous papers combinations you can come up with on your own! I chose these two sheets in fun fall colors. Here they are front and back.


First of all, raise the arm on the punch board.


Now slide the corner of your paper under the red button, square it up and punch.


Now punch the other four corners. Repeat for the other paper. The side of the papers that is facing up when you punch it will be the side that shows in the center of your pinwheel.


Back side of bird paper.


Now line your first paper up with the corresponding mark on the left side of the punch board.

Bring the arm down so that it pokes a hole through the center of your paper and anchors it in place.


Insert the included blade tool in the track, with the blade to the left of the track like so.


Slide it down the track, cutting the paper until the track ends.


Without lifting the arm, turn the paper 90 degrees and repeat. On half of the turns the corner will not line up exactly with the measurement mark - that's okay. Just make sure that the notch in the paper sits over the blade track. Repeat on the other two corners.


Back view so you can see the cuts better.
Now raise the arm and remove your first piece of paper. Repeat with the other paper, but this time you will be working on the right side of the punch board.


Now, lay your papers face down, one on top of the other at a 90° angle, like this. The paper you slit using the right side of the punch board (here the floral/purple sheet) will go on the bottom.


Make sure the holes in the centers line up.


Now, take one of the skinny sections of the bottom sheet and weave it up through the slit in the top paper just above it. Continue the maneuver, working clockwise, all the way around the pinwheel.


Now you want to add the whole thing to your attachment assembly. The attachments come with enough sets to make 10 pinwheels. At $4.99 a pack (Hobby Lobby), that puts your pinwheels at 49¢ each, if you have your paper on hand. That's already cheaper than the store, but if you use a lovely 40% off coupon like I did, then you get 10 pinwheels for $2.99, an even better deal! It's hard to beat a 29¢ toy!


The attachments have three parts, and they assemble like this:


Once you have the head seated on the straw and the spindle attached to that, slide your papers onto the spindle, still face down.


Now, take one of your hole-punched sections from the top sheet (here the yellow paper), pull it forward, and thread it onto the spindle.


Now take the skinny section from the bottom paper directly to the right of the section you just pulled forward and do the same thing. Repeat all the way around, moving clockwise and alternating between the front paper and the back.


Once all the hole punched sections are threaded onto the spindle, press on the end cap.


You're all done!


Look at it spin!


Here's what it looks like on the back. If you'd like your pattern to show on the blades instead of the center, just make sure the pattern is face down when you punch your paper.


Of course you can also just do this with one paper, which will make a 4 blade pinwheel, also adorable. If you do so, you need to work on the left side of the punch board when using the blade.

This punch board has been so much fun! Best of all, the attachments are reusable, so if say, your two year old crumples up beyond repair the pinwheel you made him, you can pull the assembly apart and make a new one! You can also use just about any paper straw out there, which really opens up your color/design options - although those 15 inch gray and white striped ones in the kit are super awesome!

Of course you can certainly make pinwheels without the attachments - they just won't spin. But they do make gorgeous decorations! You can anchor the center with a fun decorative brad. I can see some little stationary ones attached to paper flags to make up an awesome baby shower banner, and what fun props they would make for a photo shoot! Or you could even attach them right to a memo board with a colorful push pin! Oh, and what about gift toppers? And cards? The possibilities are endless!

We R Memory Keepers provided me with a Pinwheel Punch Board to try, but they did not compensate me for my review (or even ask for it), and all opinions are my own.