

We're going to start this series off with the humble zipper foot. This is probably the foot that, after the basic zigzag foot, sees the most use for a lot of sewers (that's those who sew, not the series of pipes leading away from your toilet!).

The zipper foot comes with most sewing machines, but if you don't have one, you can get one on Amazon or Ebay for under $5. The main function of a zipper foot is, of course, to help you put in zippers. But what makes a zipper foot so much better for this than your standard zigzag foot? Well, a couple of things. First is the narrow width on the front, which allows you to get right up next to your zipper, and second is the raised area on either side that fits over the teeth of the zipper.
Let's try sewing a simple zipper pouch with a regular zigzag foot. Now I want to point out that you can do this a little better if your machine will adjust needle positions, which many will. But some will not, so I'm going to do this with the needle in the standard center position. This is also the position your needle will need to be in if you are using the zipper foot.

There are many, many great tutorials for zipper pouches out there, so for the purposes of this post I'm just going to show you a very simple, unlined felt pouch. I made two for this post, and if you want to make one the same size, I just cut a piece of 9 x 12 eco-felt in fourths and used two of the cut pieces for each pouch.
First lay your fabric right side up, and lay your zipper right side down on top of it, lining up the edges. Pin in place.

Now carefully sew it in place, keeping the edge of the presser foot as close to the teeth of the zipper as you can.

Look how wonky the stitching ended up! Even though I was very careful, because there is no raised area on the presser foot to sit on top of the zipper teeth, the presser foot slipped up on top of them a time or two. Also, look how close to the edge of the zipper the stitching is!

In most cases when you install a zipper, you're going to want to topstitch along the edge to make it lay flat and give it a neat, finished look. When we fold back the felt here, you can see that there's no room left on the width of the zipper tape to topstitch.

At this point I sewed on the other piece of felt to the other side of the zipper and sewed up the sides, which I'll show you on the other pouch.
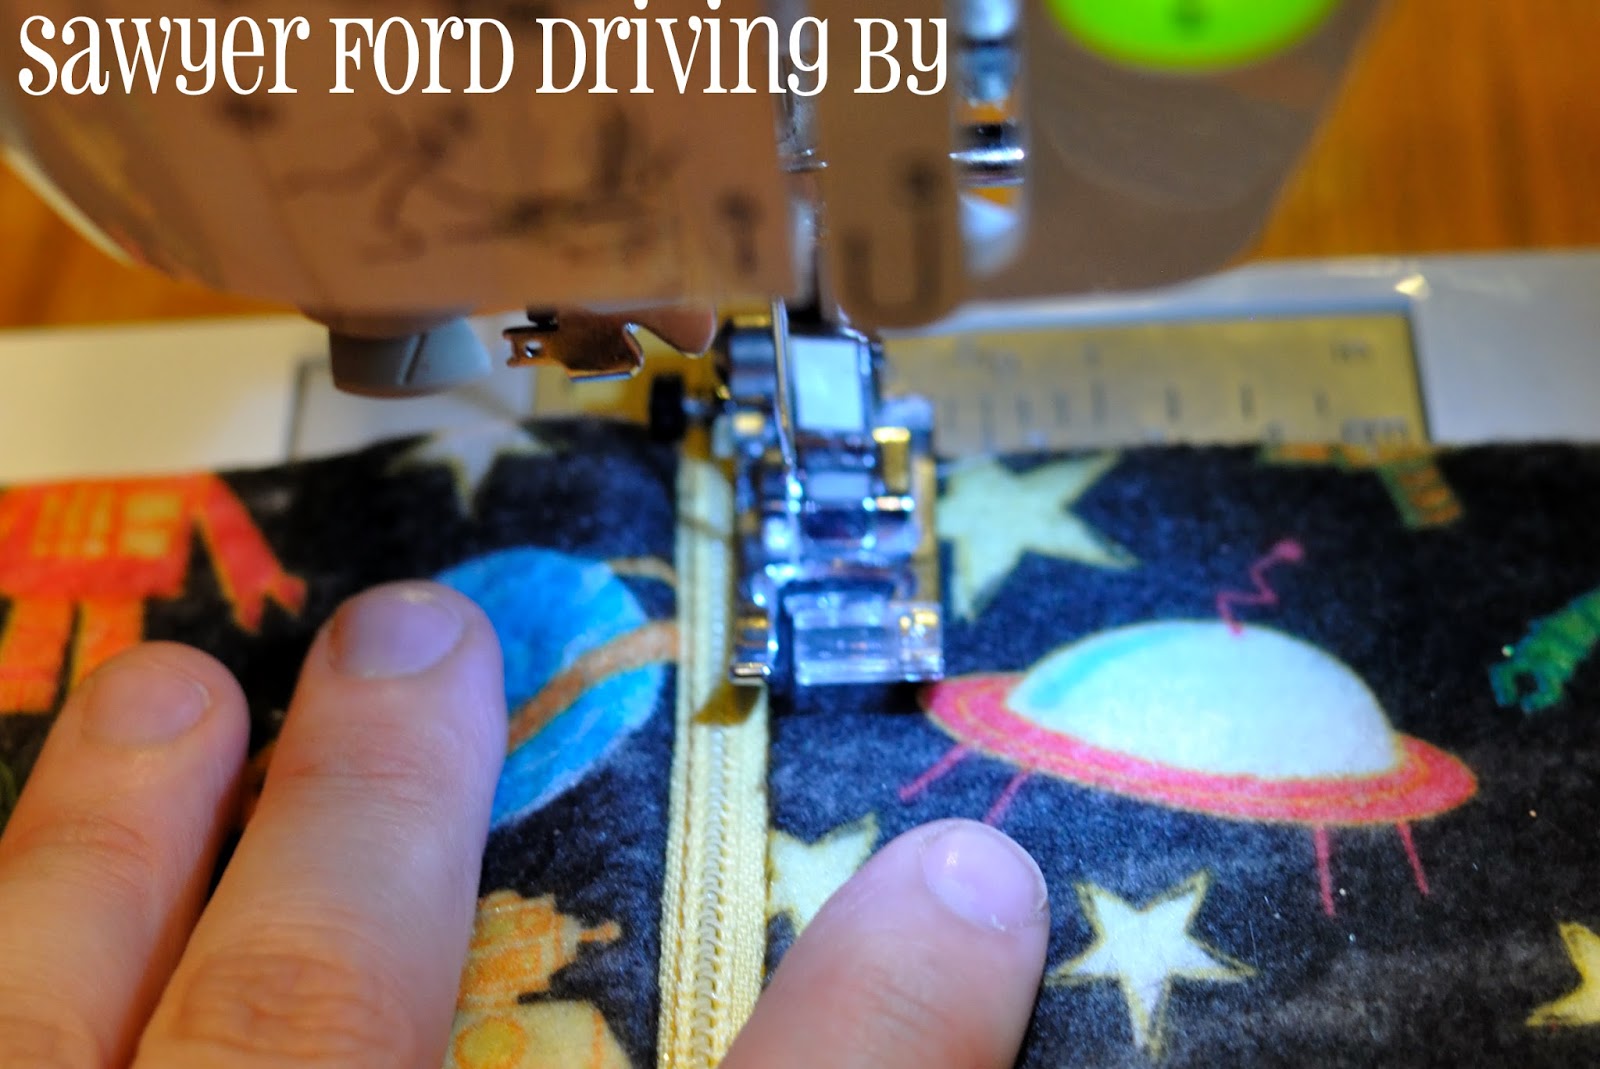
Now let's make one with our zipper foot! Start the same way, fabric right side up, zipper right side down, and pin. This time, I'm even going to sew the pouch with the zipper on the bottom to show you how easy the zipper foot makes it. You can see here that the zipper foot sits right on top of the teeth of the zipper.

Sew the zipper to the fabric. Because of the raised notch, it's easy for me to keep the whole assembly in place, even though there is a thick layer of felt between the zipper and the foot. Additionally, (and the reason I sewed this one with the felt on top), the edges of the fabric and zipper line right up with the edge of the zipper foot, so even though I can't see my zipper, I still know I'm sewing it on straight.

Look how neat the line of stitching is here!

And look how much room we have to topstitch!

I sewed on the other side the same way. See how neat it looks with the zipper sewn so close?

Go ahead and topstitch along your zipper. Since you want more distance between your zipper teeth and your stitch line than when your sewed your zipper to the fabric, go ahead and switch to your regular zigzag foot. Keep the edge of the foot aligned with the teeth of the zipper.
Repeat on the other side.

Now lay your two sides against each other, right sides together. Make sure that the sides of the zipper fold over the fabric and the teeth are pointing away from the body of the pouch. Also, make sure you unzip your zipper halfway so that you don't sew it closed with the zipper pull on the outside!

Sew up all three sides and clip your corners, being careful not to cut the stitches on the corners.

Flip it right side out and turn your corners. All done!

Look how much neater the ends of the zipper look on the one sewn with the zipper foot!


This little guy is going to corral all the random Hot Wheels in my purse.

Wasn't that easy? So go - grab your zipper foot and conquer your fear!
Great tutorial! Thanks so much for partying with us at Show-Licious Craft & Recipe Party!
ReplyDelete~ Ashley